SOURCE VIDEO · course39
Fireball · opacity and flame pattern
教学记录5.mp4 · 00:18:18
已补充透明度新增支路、Composite模式变化、Noise与Gradient Ramp分阶段参数。原生工程与完整逐帧核对仍在补做。
视频来自本机 [本机资料路径]
新增透明度支路:先看连接,再抄数值
本节完成新增节点及多个试调时点的截图核对。下方已提供两个原生MAX阶段与实际渲染;完整连续操作与原片视觉匹配仍未完成;不要将以下时点合并为一组最终参数。
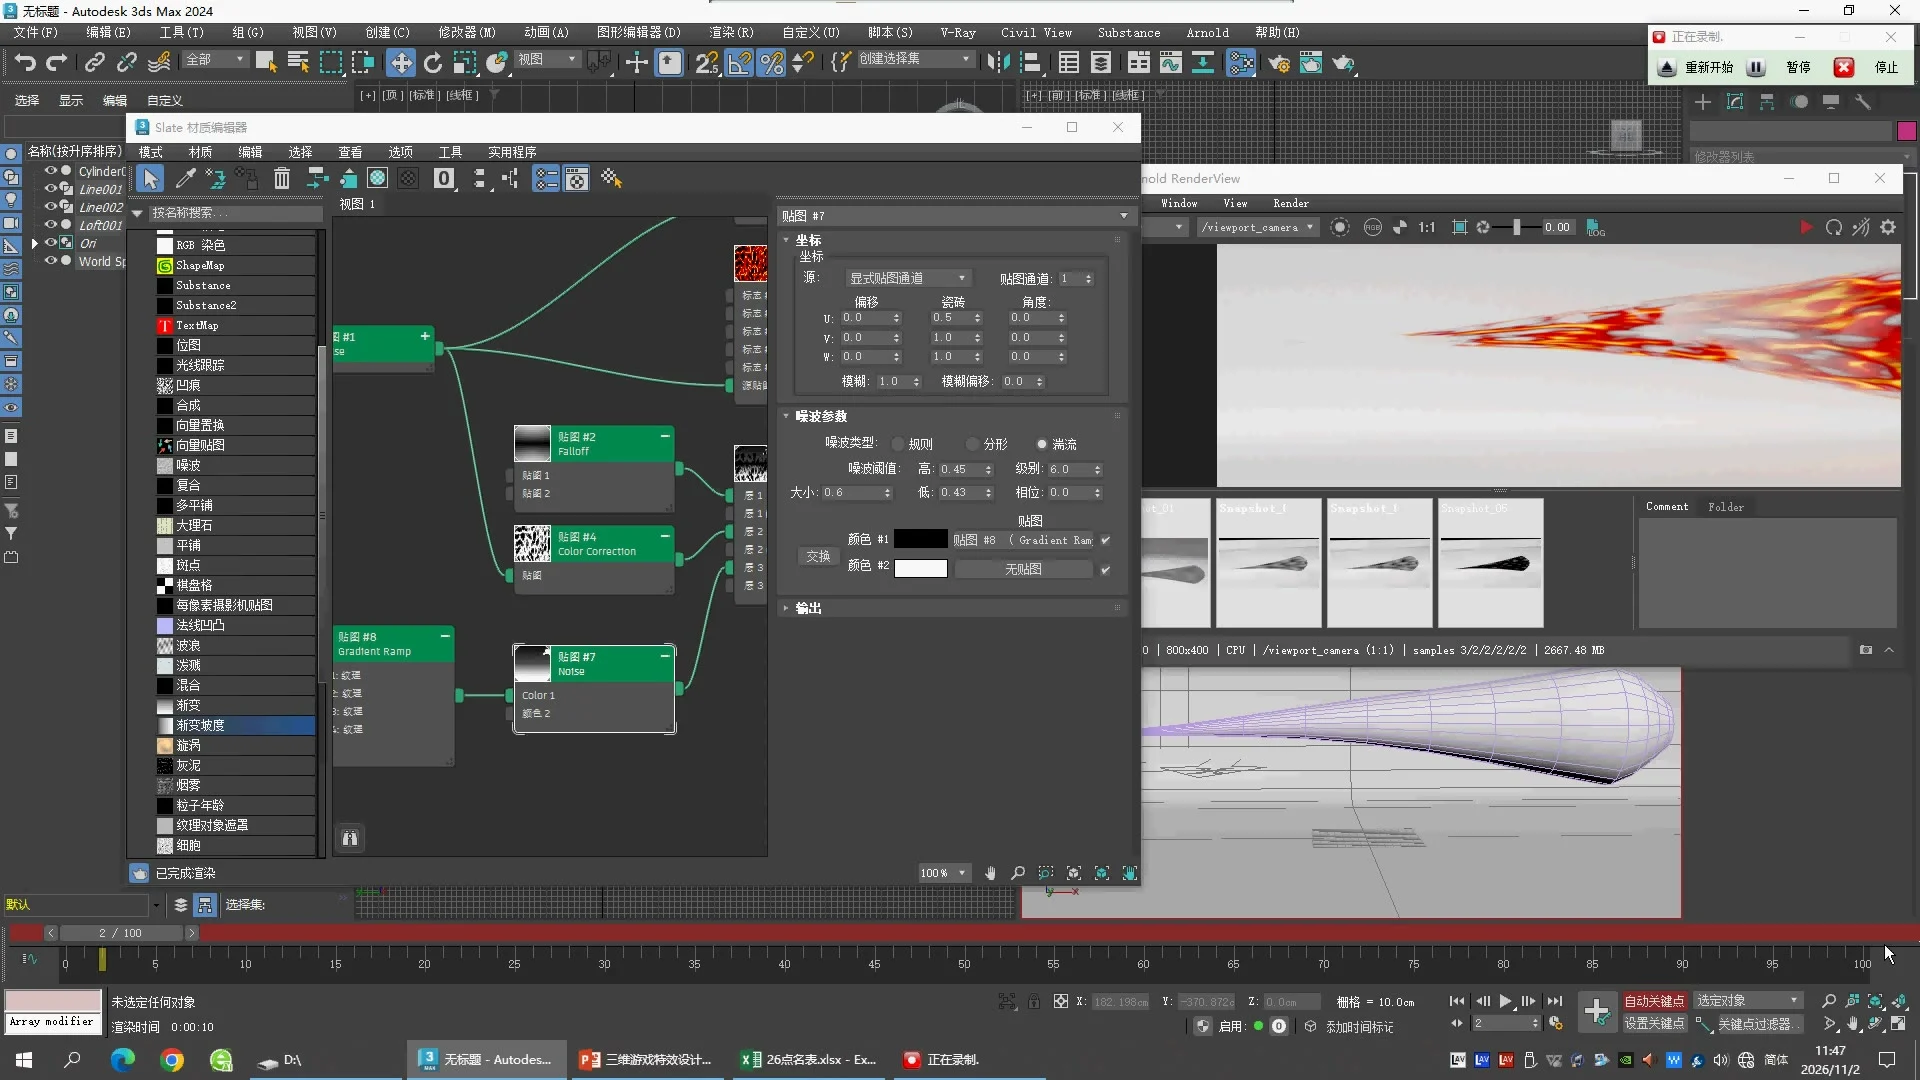
Gradient Ramp #8 → Noise #7.Color 1
Noise #7 → Composite #3.Layer 3
Falloff #2 → Composite #3.Layer 1
Color Correction #4 → Composite #3.Layer 2
Composite #3 → Arnold Standard Surface.opacity
第38课已有的颜色支路继续保留。本课把另一张Noise加进透明度支路,调整火球不同部位的显示与消失。Gradient Ramp接在Noise的Color 1上,不是接Noise的坐标,也不是接Composite的Layer 3 Mask。
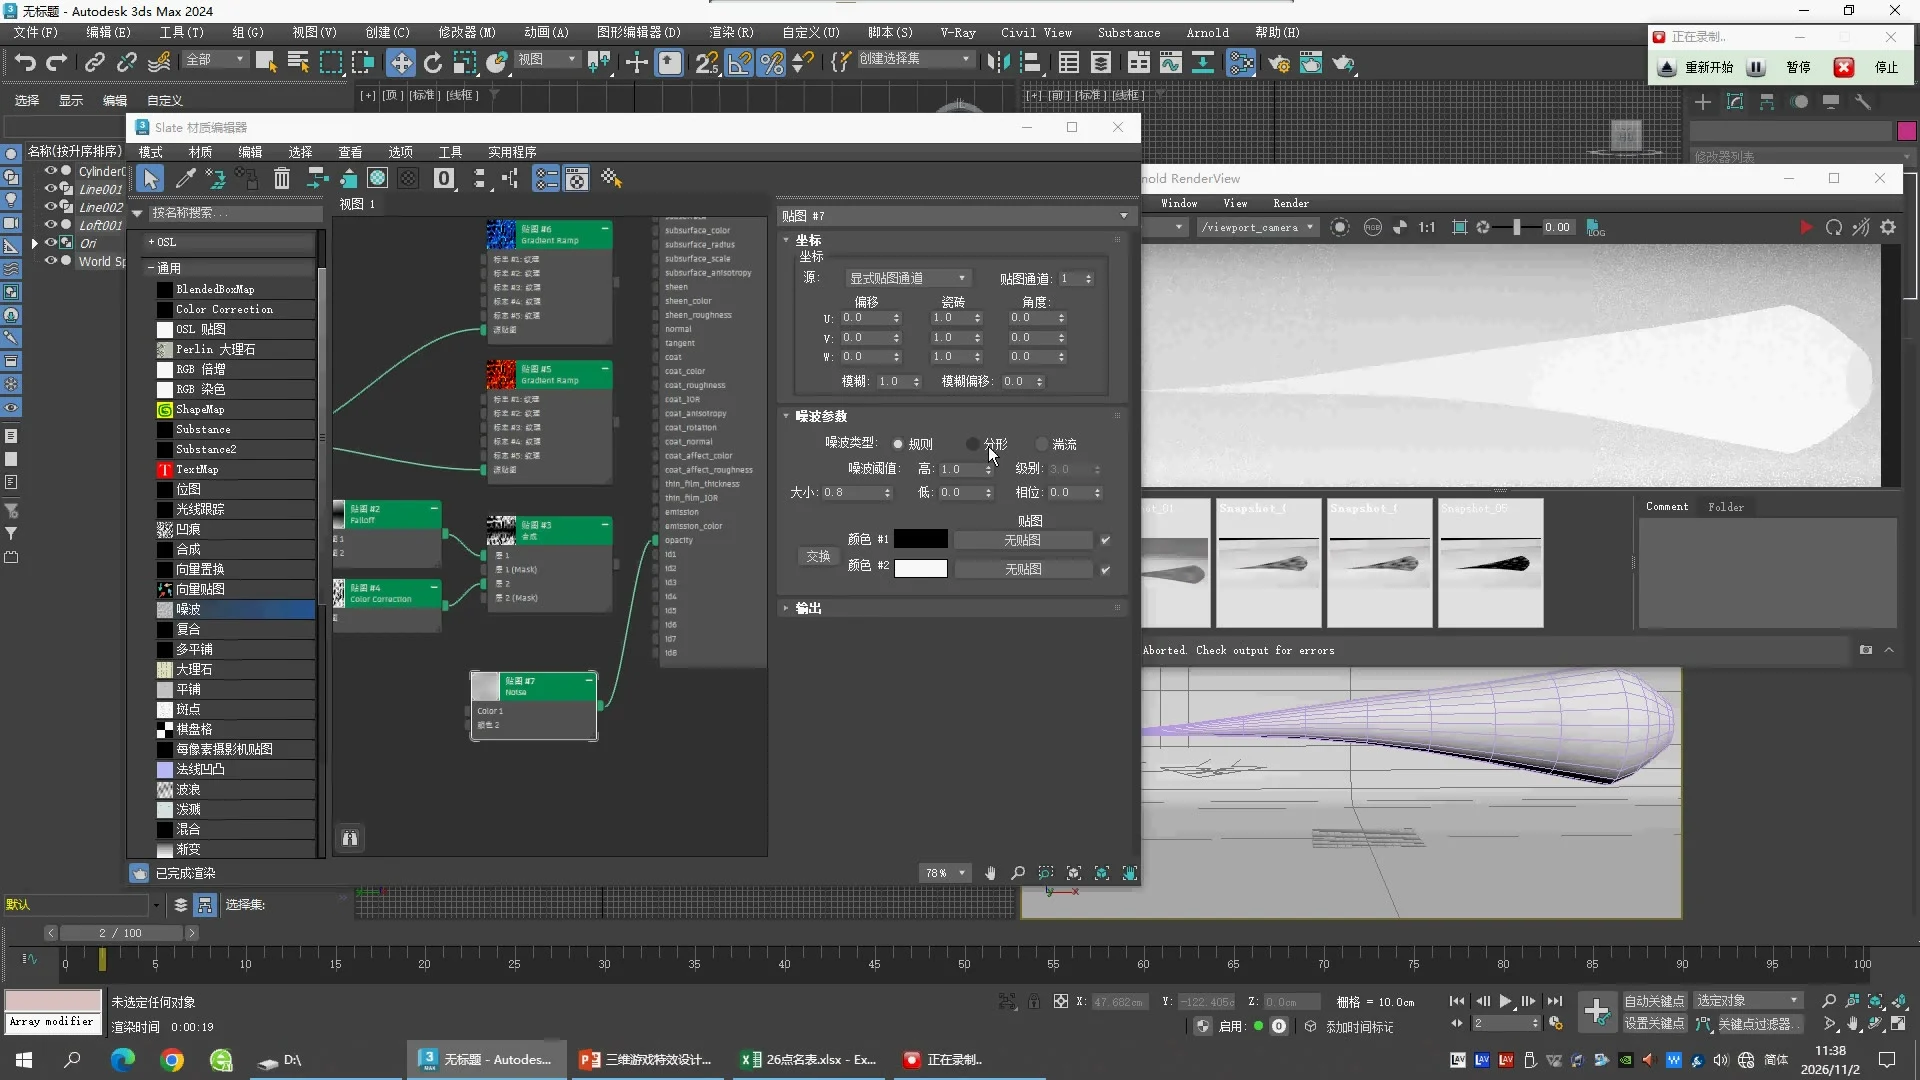
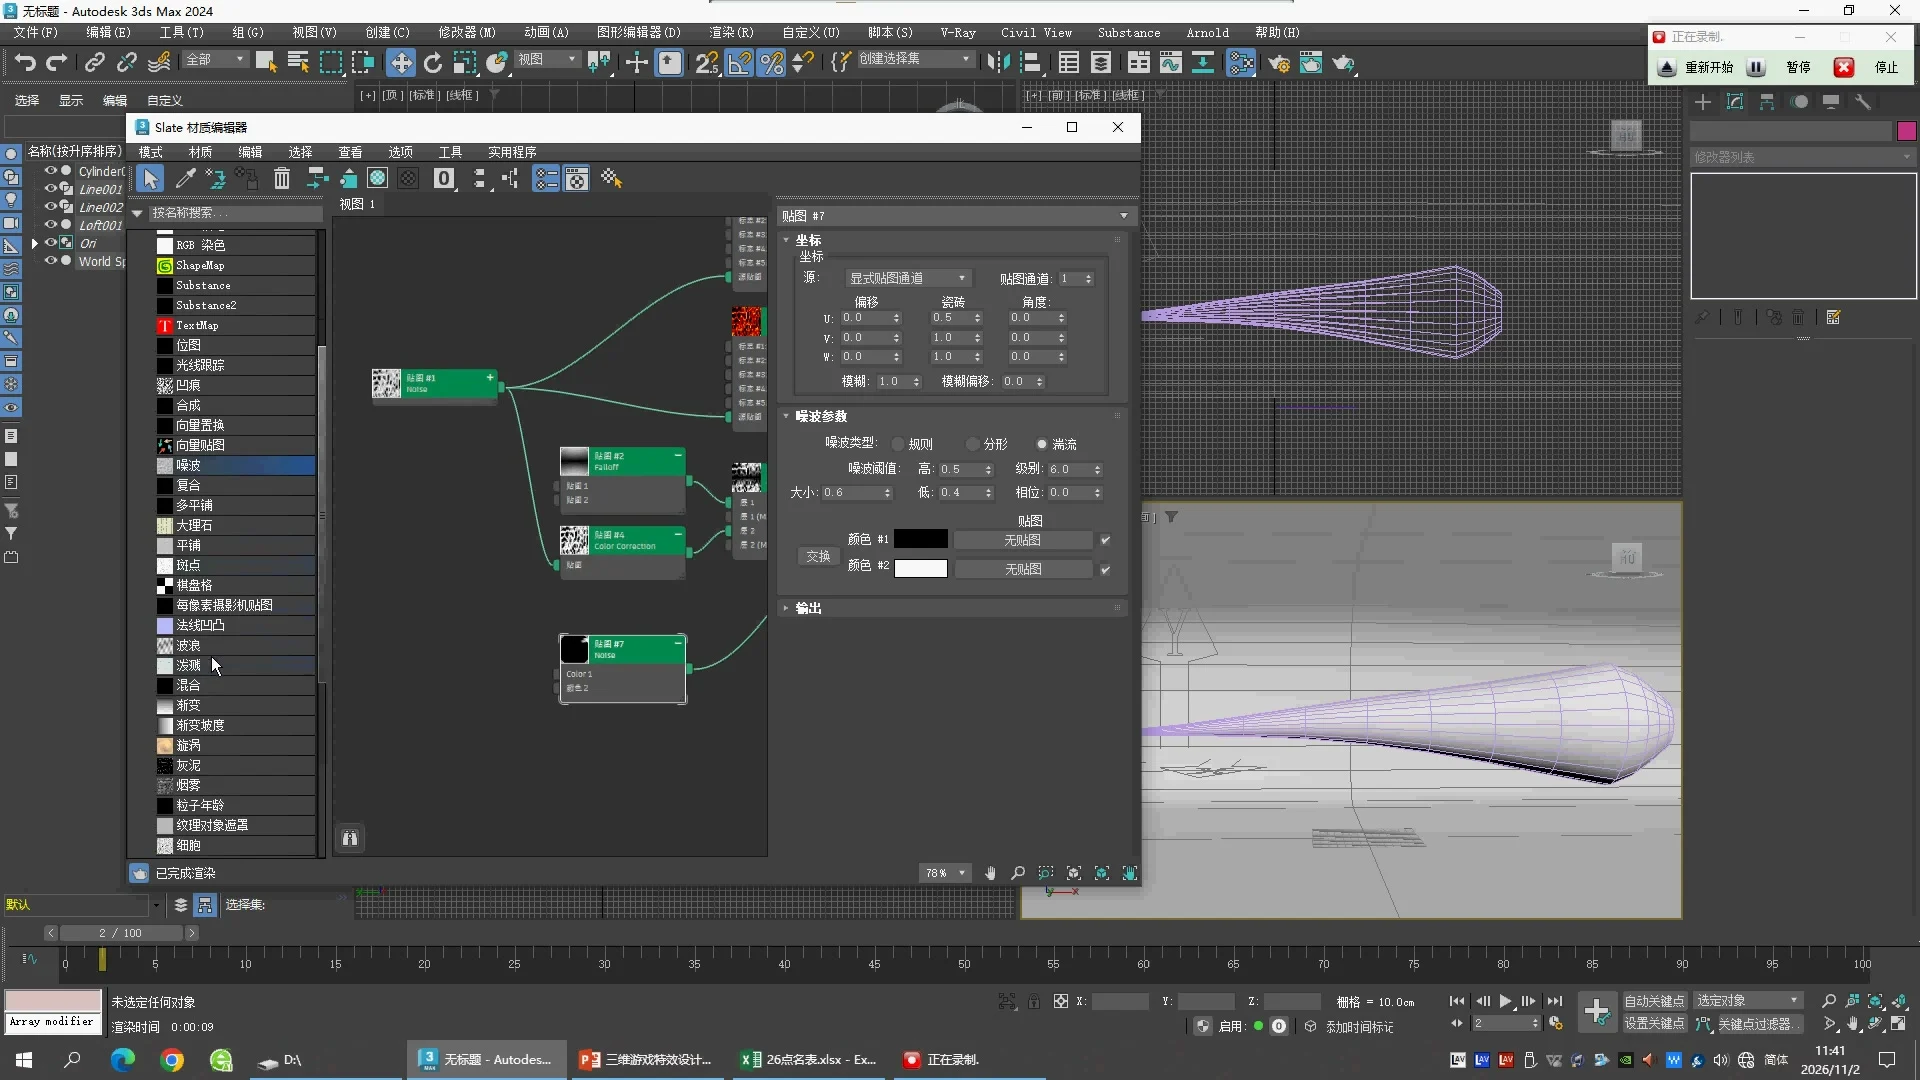
1 · 建立Noise #7
| Parameter | 04:00 | 10:04 |
|---|
| Coordinates Source / Channel | Explicit Map Channel / 1 |
| U,V,W Tiling | 0.5, 1, 1 |
| Offset / Angle | 全部0 |
| Noise Type / Size / Levels | Turbulence / 0.6 / 6 |
| Low / High | 0.4 / 0.5 | 0.43 / 0.45 |
| Phase | 0 | 0 |
| Color 1 | Black | Gradient Ramp #8 |
| Color 2 | White |
11:00当前frame30时Phase显示1.2;10:04当前frame2时显示0。尚不能据此确定关键帧所在位置、插值或循环。先保留这两条观测,不虚构完整动画。
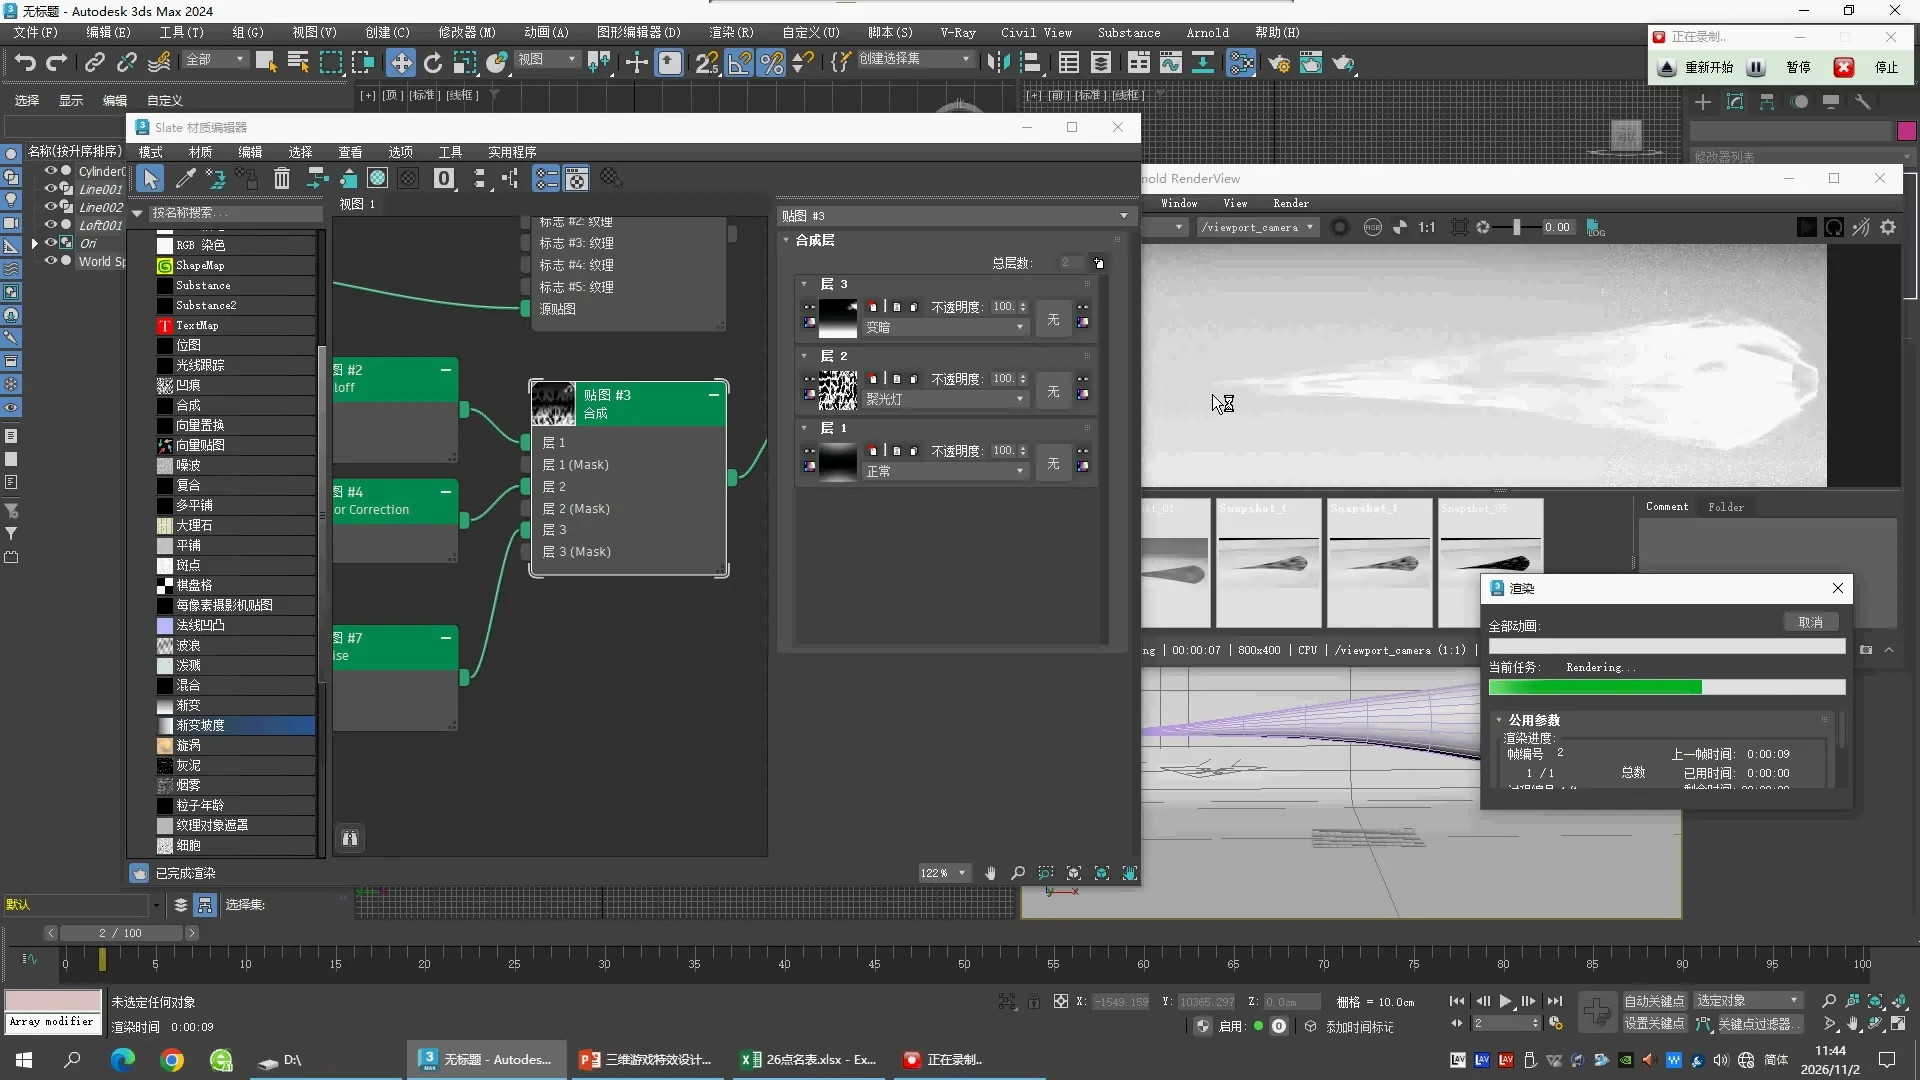
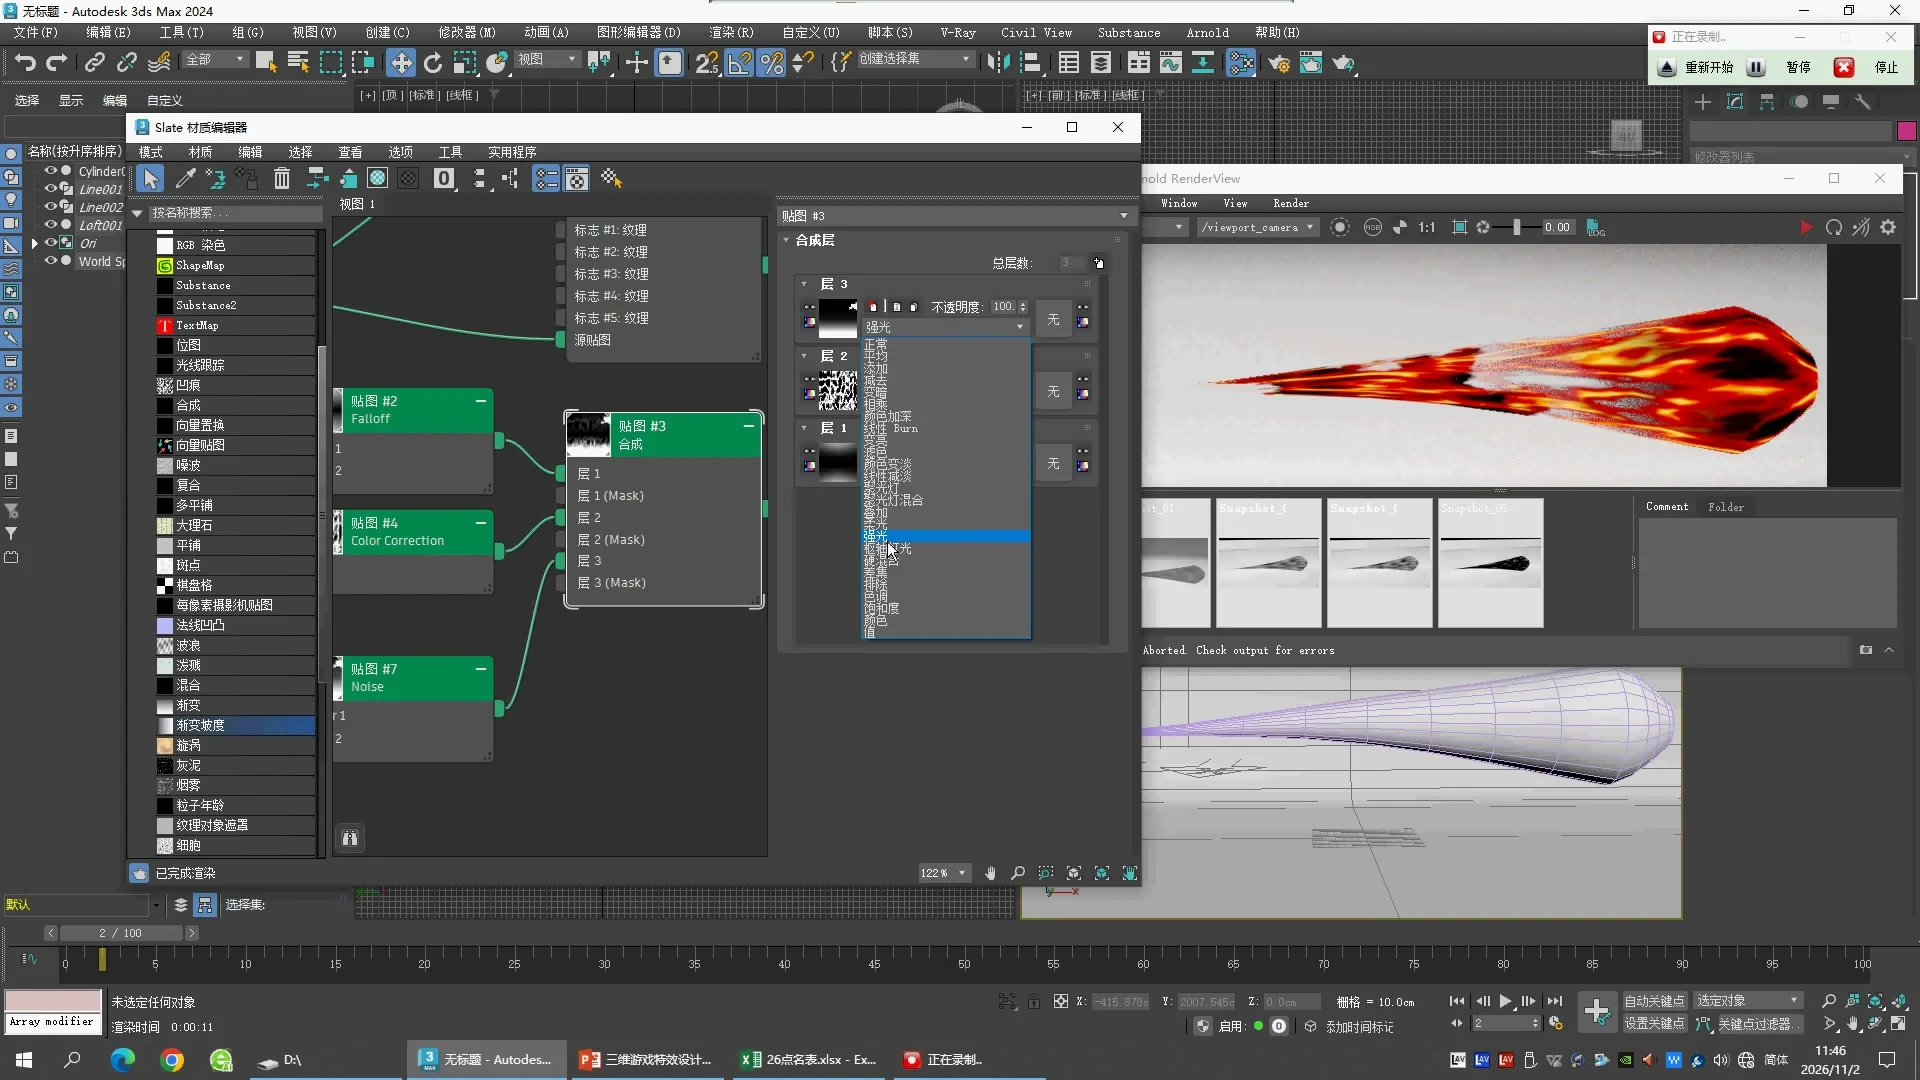
2 · Composite各层不要沿用上一课
07:00及09:30截图中:Layer 1 = Normal,Layer 2 = Spotlight(不是Spotlight Blend),Layer 3 = Darken;每层Opacity=100。09:00还在试Hard Light,并展开模式菜单。09:30已回到Darken,后续是否再次改动仍需连续核对。
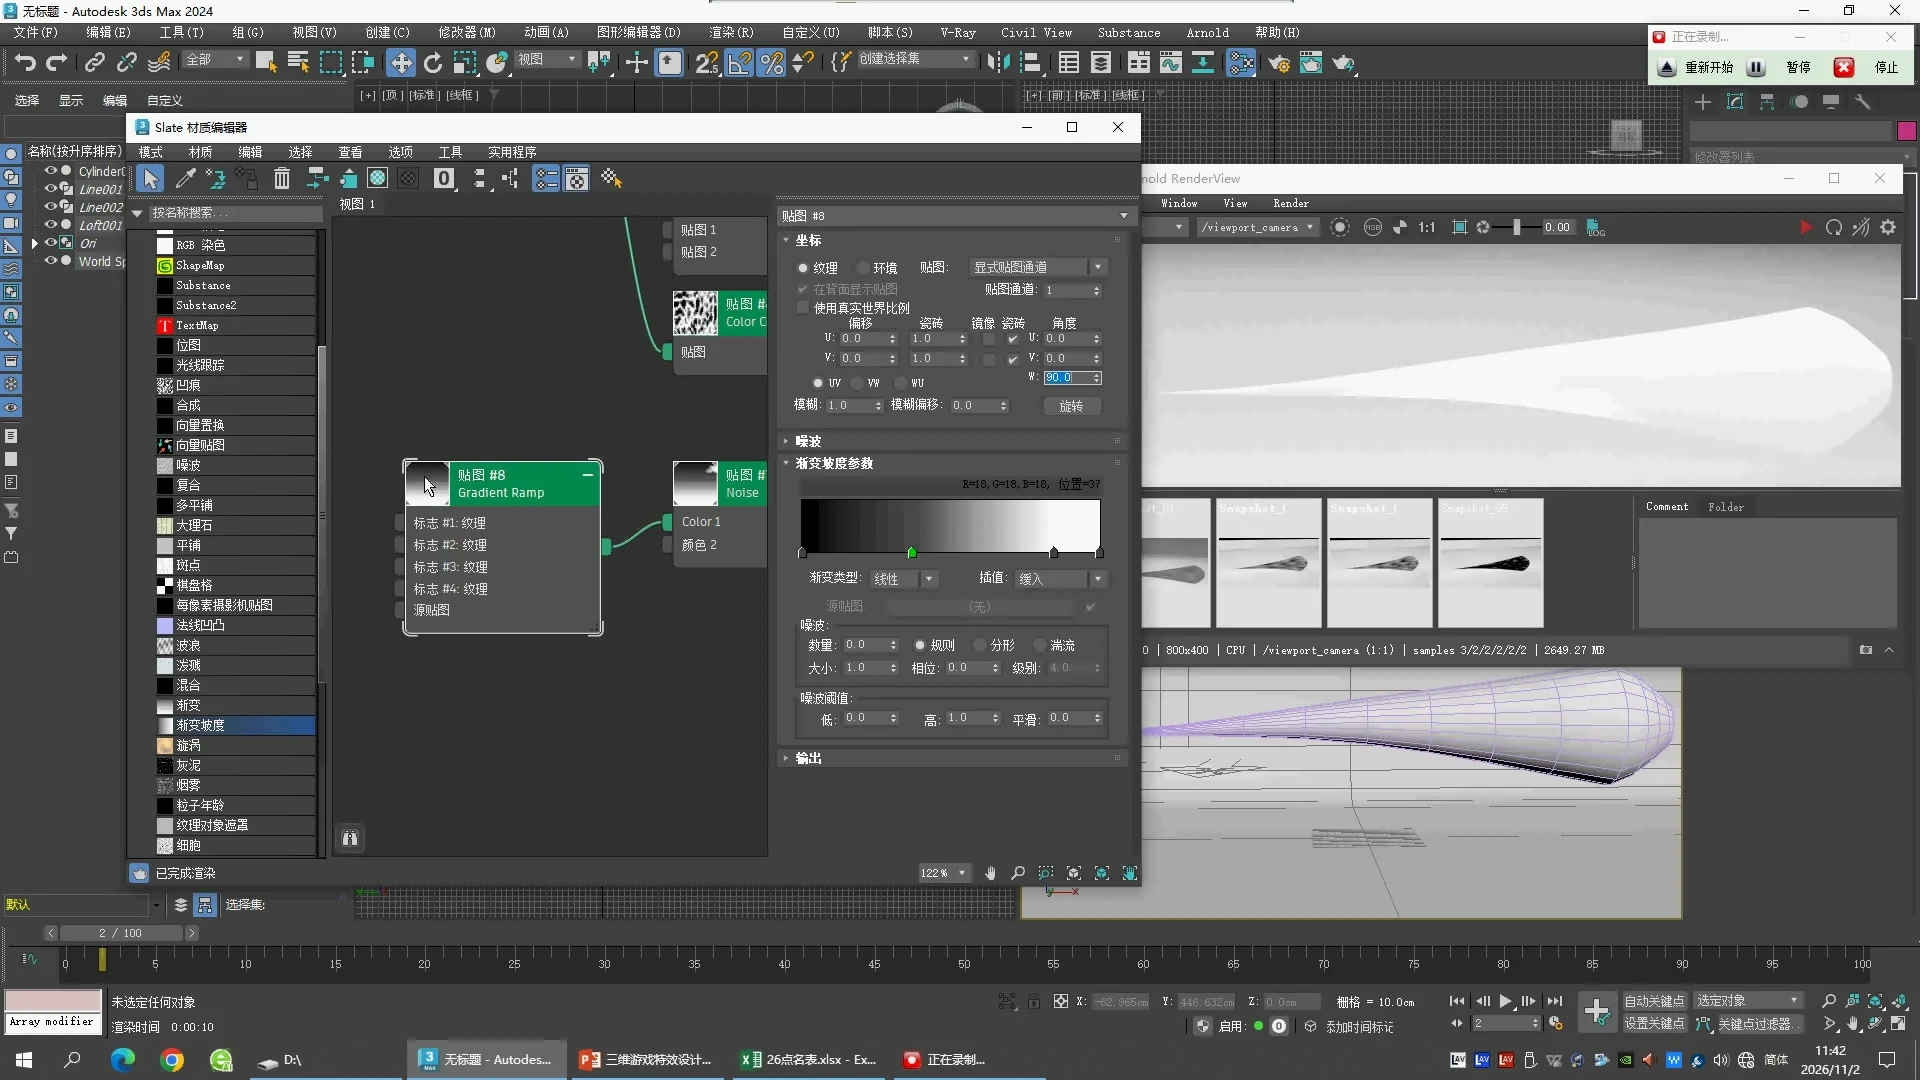
3 · Gradient Ramp #8由平滑过渡改成硬边
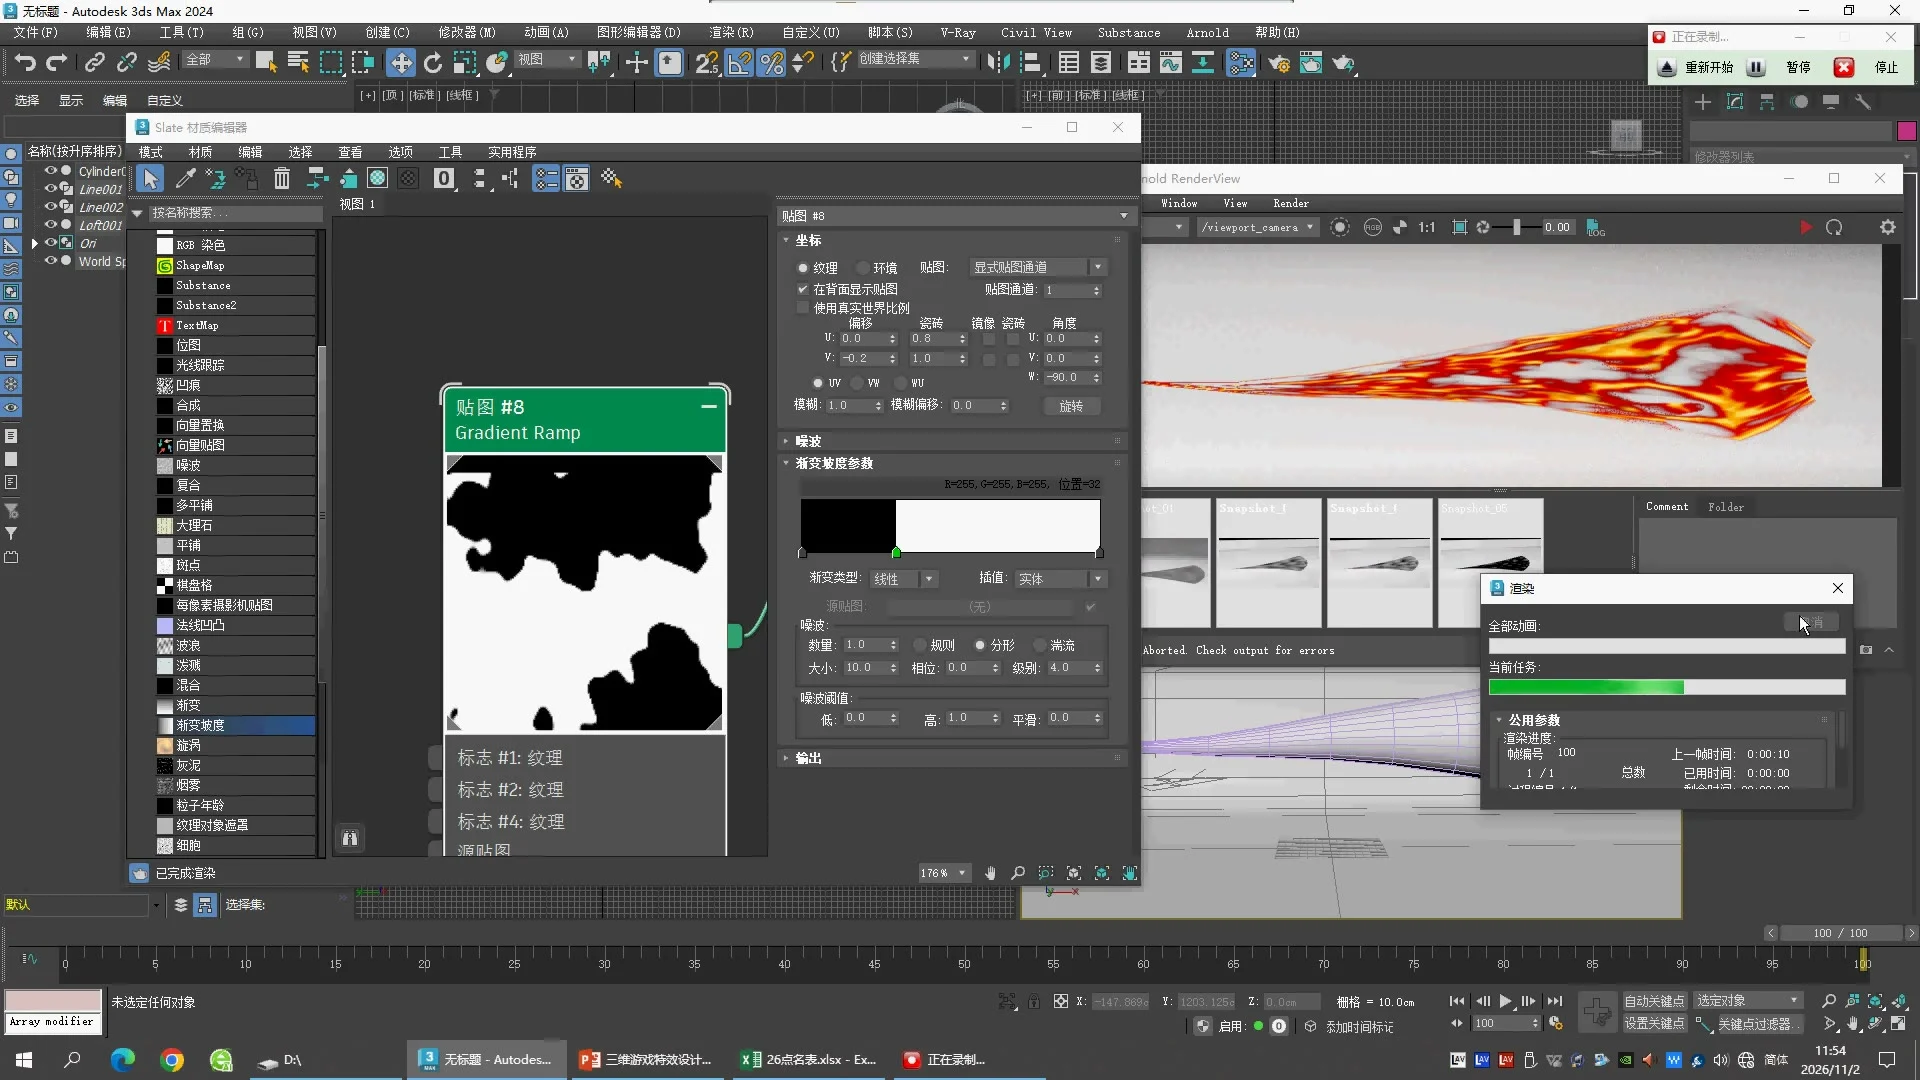
12:00:Gradient Type=Linear,Interpolation=Ease In,W Angle=90,U/V Tiling=1/1,白色标志Position=62,Noise Amount=0。此时用渐变控制透明度变化的范围。
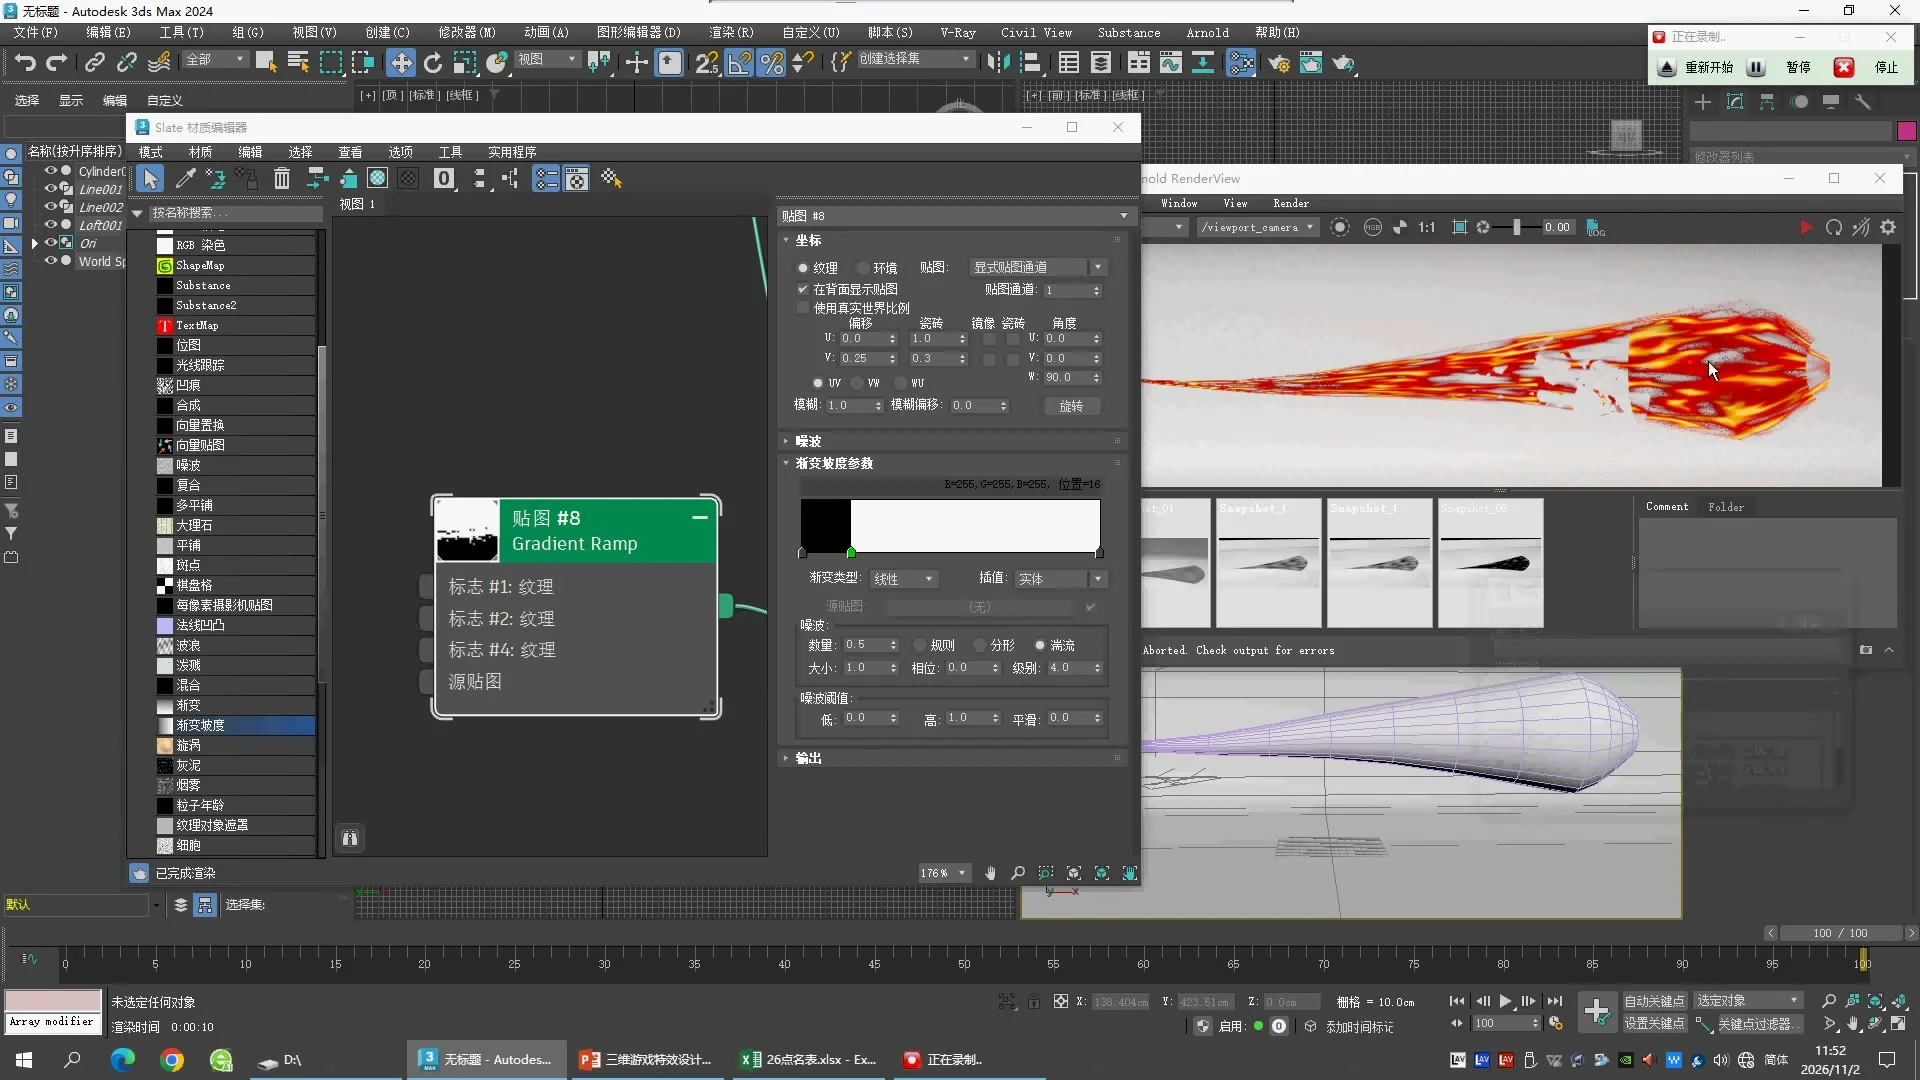
15:00:Interpolation改为Solid,白色标志Position=16;Noise Amount=0.5,Type=Turbulence,Size=1,Levels=4,Phase=0。W Angle仍90,V Tiling=0.3;V Offset正处输入状态,此帧不作为可靠数值。
4 · 末段Gradient Ramp #8检查点
| Parameter | 18:10可见值 |
|---|
| Source / Map Channel | Explicit Map Channel / 1 |
| U Offset / V Offset | 0 / -0.2 |
| U Tiling / V Tiling | 0.8 / 1 |
| U Angle / V Angle / W Angle | 0 / 0 / -90 |
| Gradient Type / Interpolation | Linear / Solid |
| 白色标志Position / RGB | 32 / 255,255,255 |
| Noise Amount / Type | 1 / Turbulence |
| Noise Size / Levels / Phase | 40 / 10 / 0 |
| Noise Threshold Low / High / Smooth | 0 / 1 / 0 |
17:00还试过Size=0.5、Levels=4;17:23试过Size=10、Type=Fractal;18:00及18:10则是Size=40、Levels=10、Turbulence。对应预览从细碎点状变成大块边界。本课不能只抄某一张中段截图。
练习顺序
- 先另存第38课文件,建立Noise #7和Gradient Ramp #8,不改颜色支路。
- 先用04:00的Noise数值观察黑白分布,再接Gradient Ramp到Color 1。
- 给Composite增加Layer 3并连接Noise,按09:30设置各层模式。
- 分别保存平滑渐变阶段和Solid硬边阶段,对照透明范围。
- 末段按上表设置Gradient Ramp,检查头部与尾部变化;未显示的端点和原动画须继续核对。
尚待完成:Gradient Ramp全部色标、Noise #7最终动画、各层末段模式、相机/模型在本课的变化、原生工程读回及实际渲染。第38课的默认Falloff曲线与补设场景也仍属继承差异。
04:00 原片证据
07:00 原片证据
09:00 原片证据
09:30 原片证据
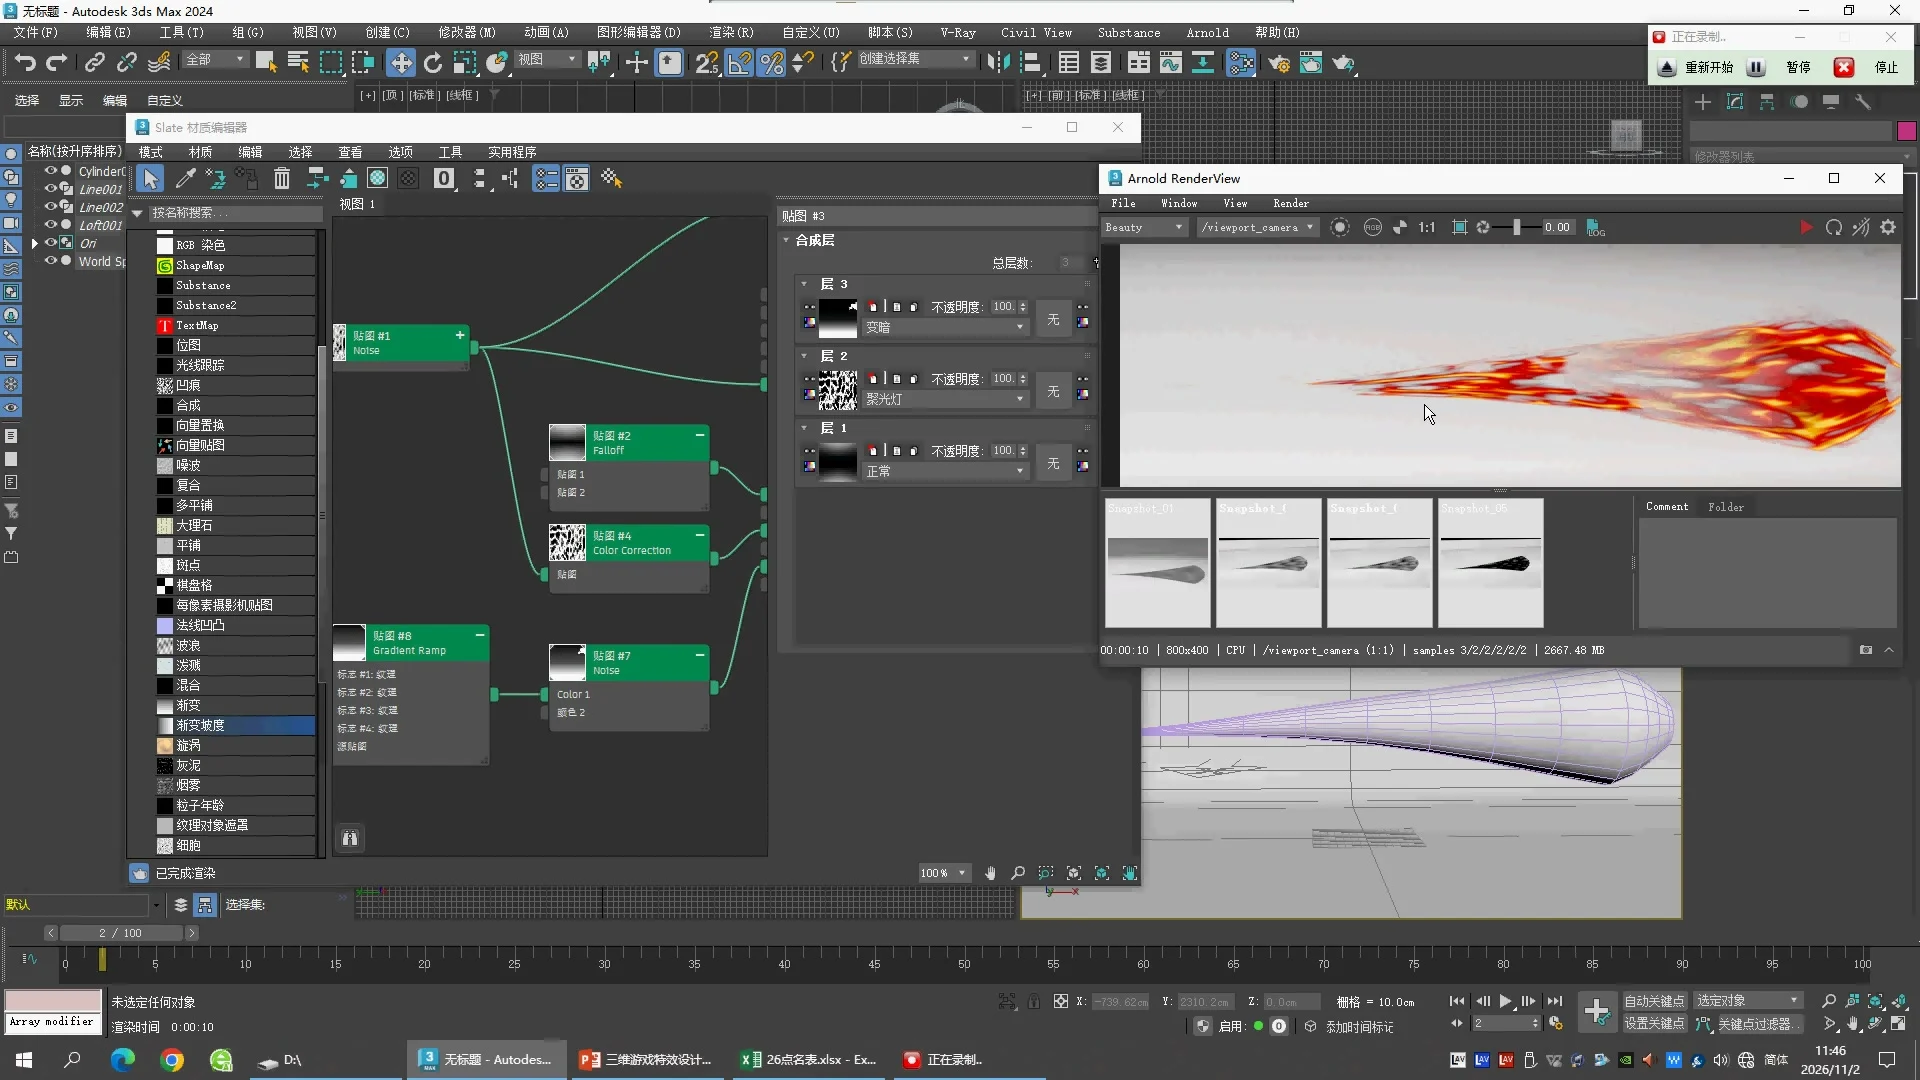
10:04 原片证据
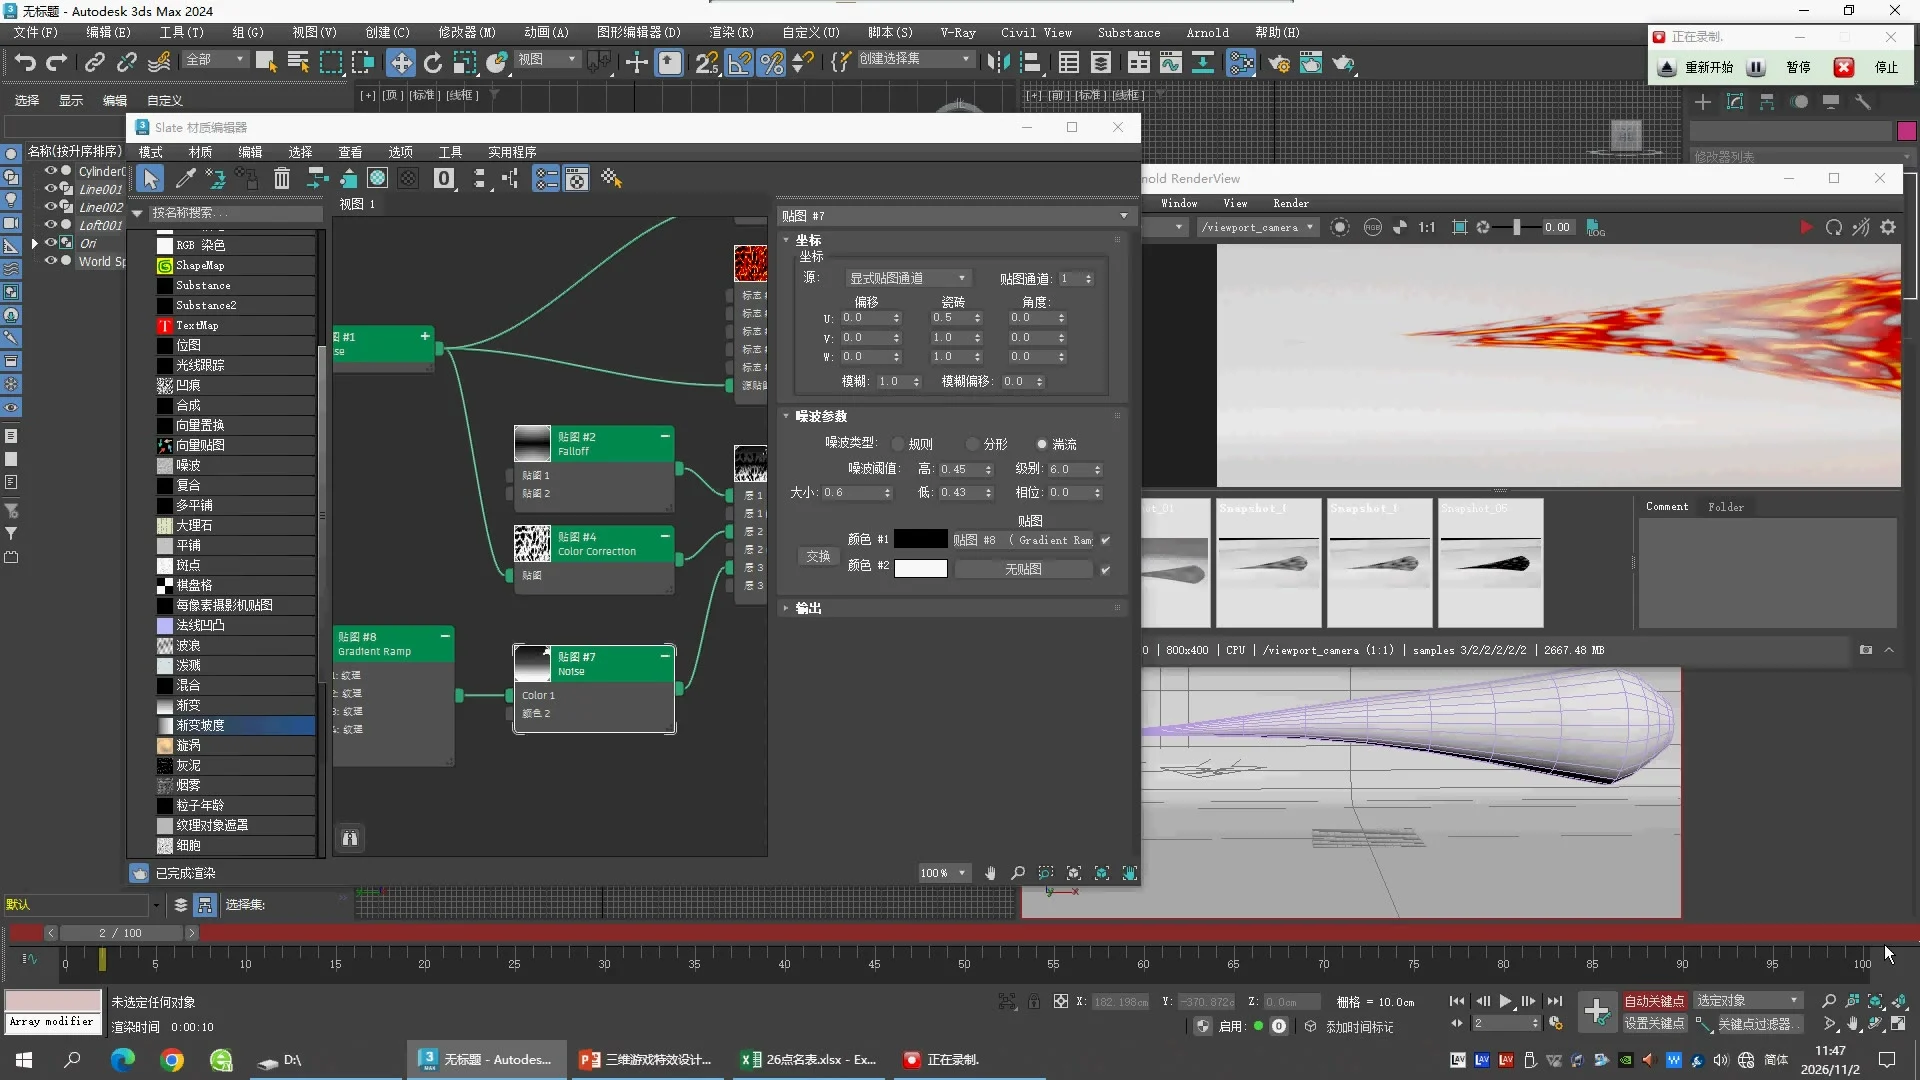
11:00 原片证据
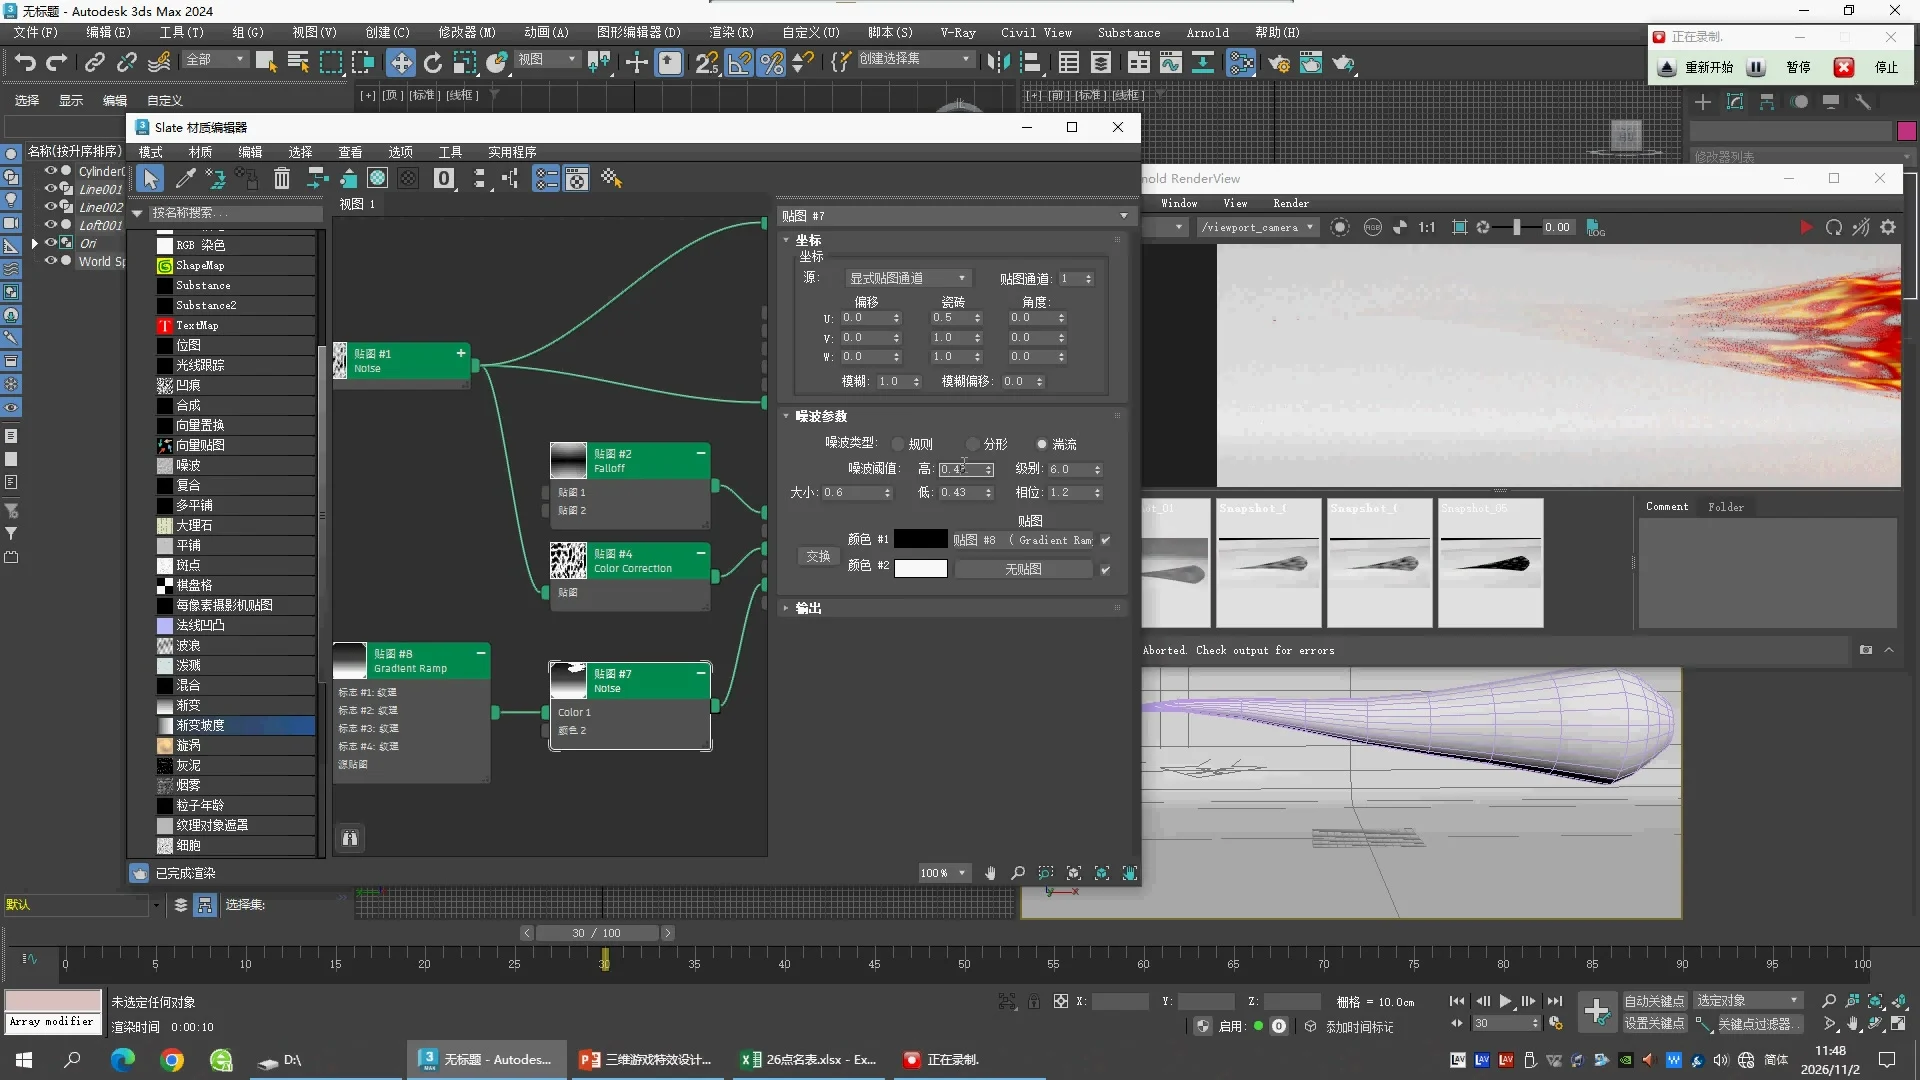
12:00 原片证据
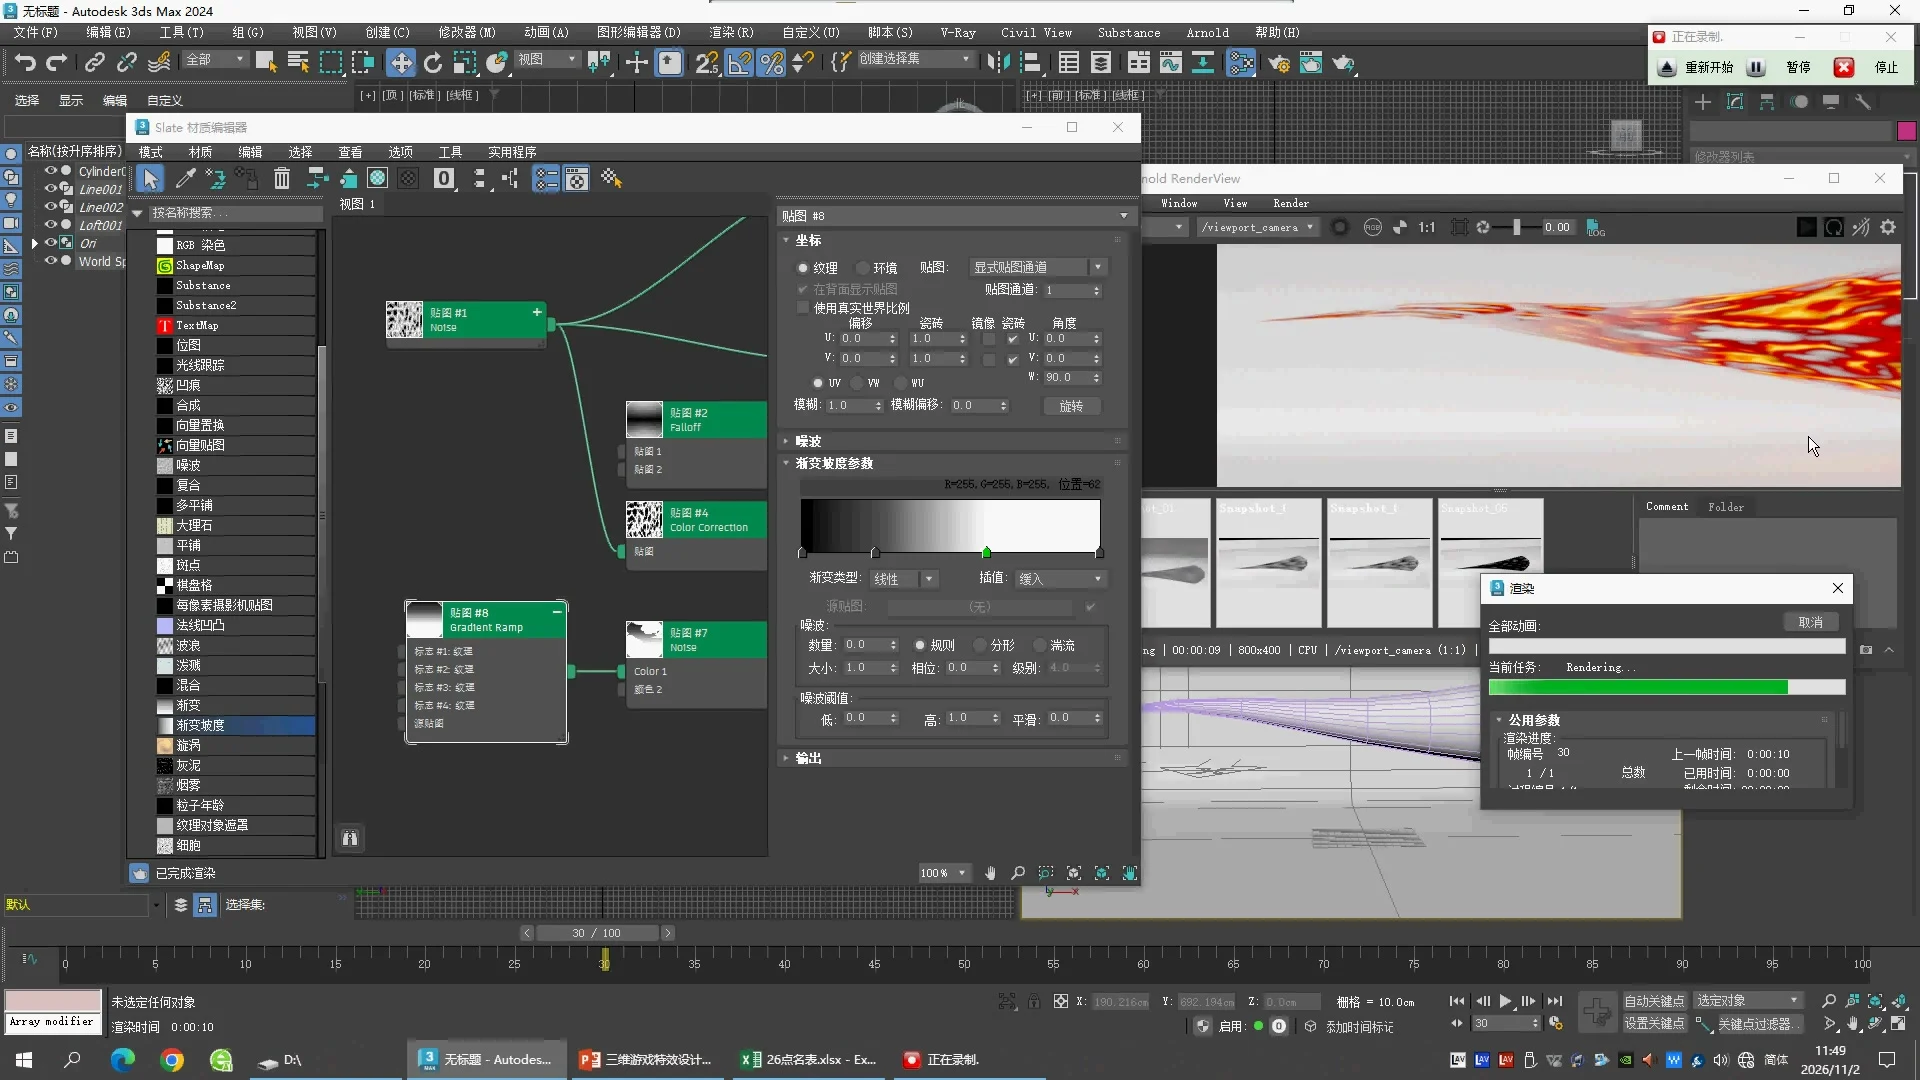
15:00 原片证据
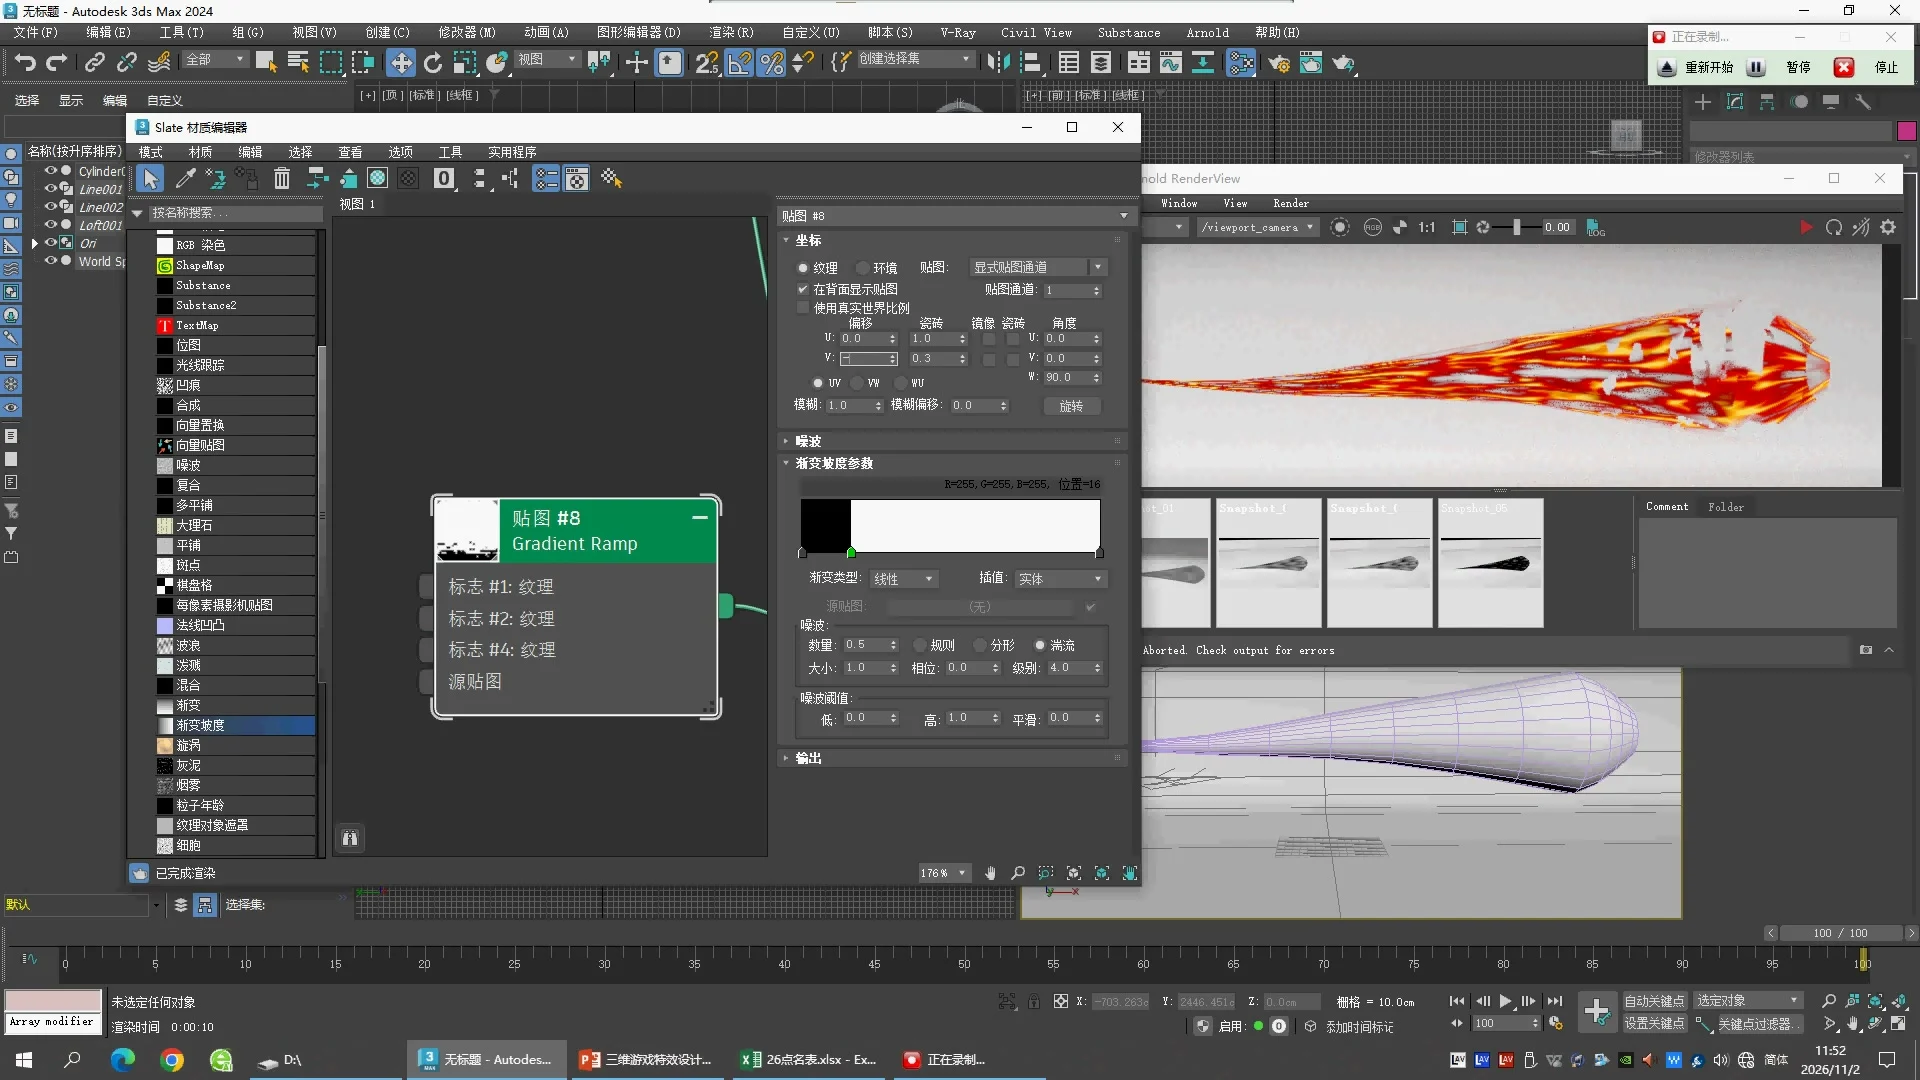
17:00 原片证据
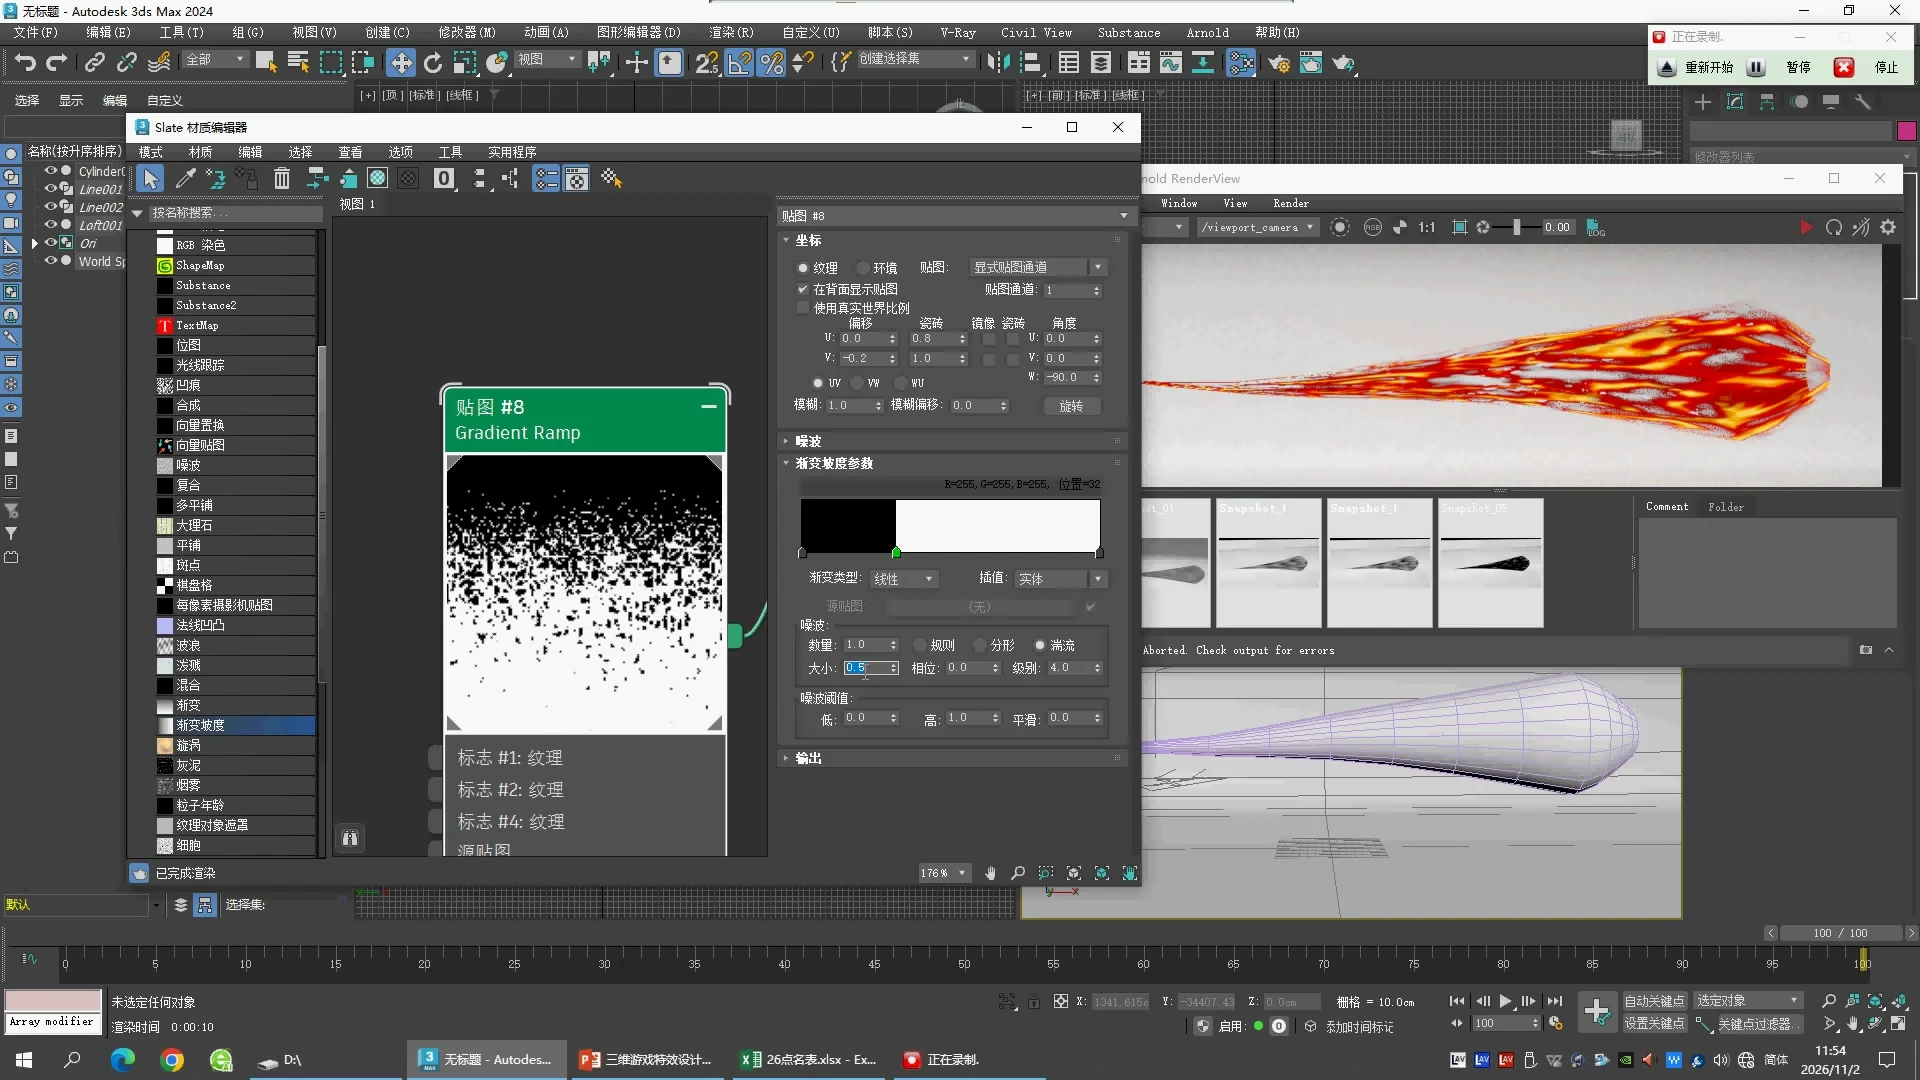
18:00 原片证据
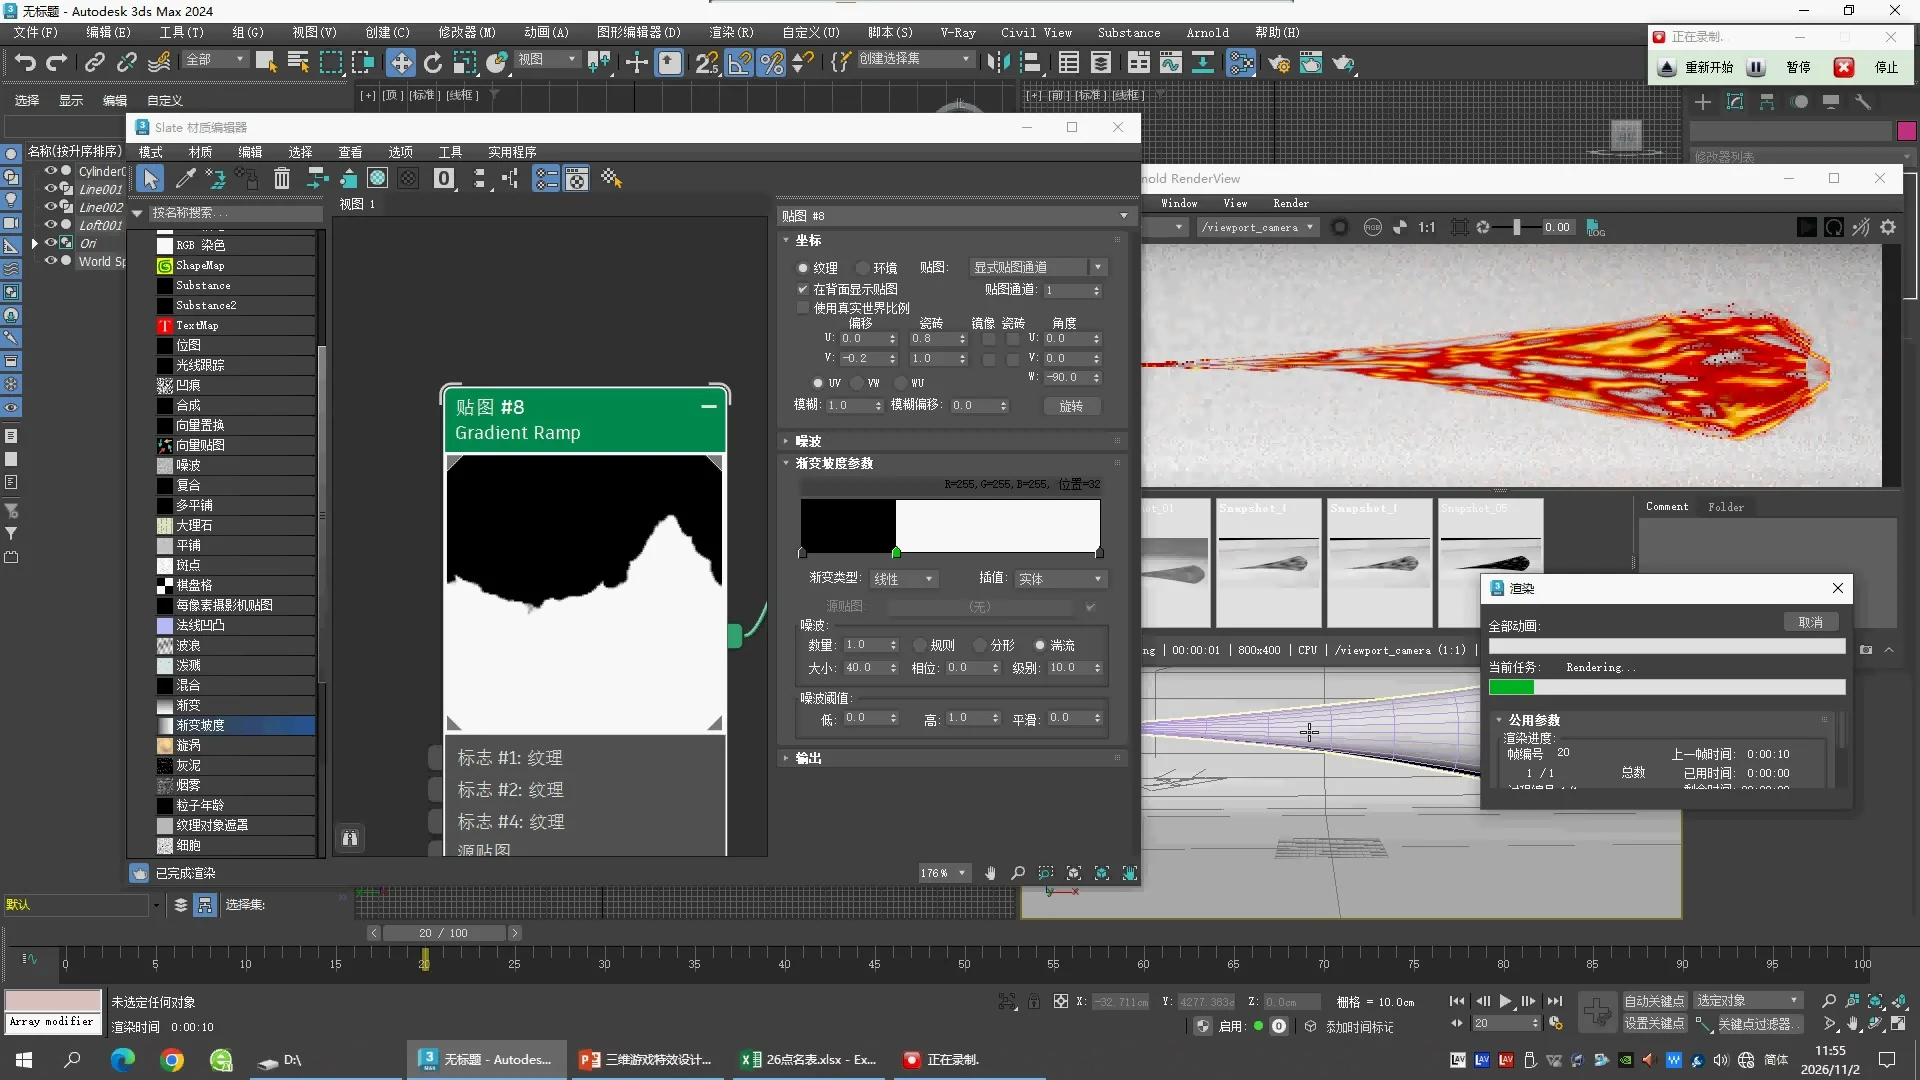
18:10 原片证据
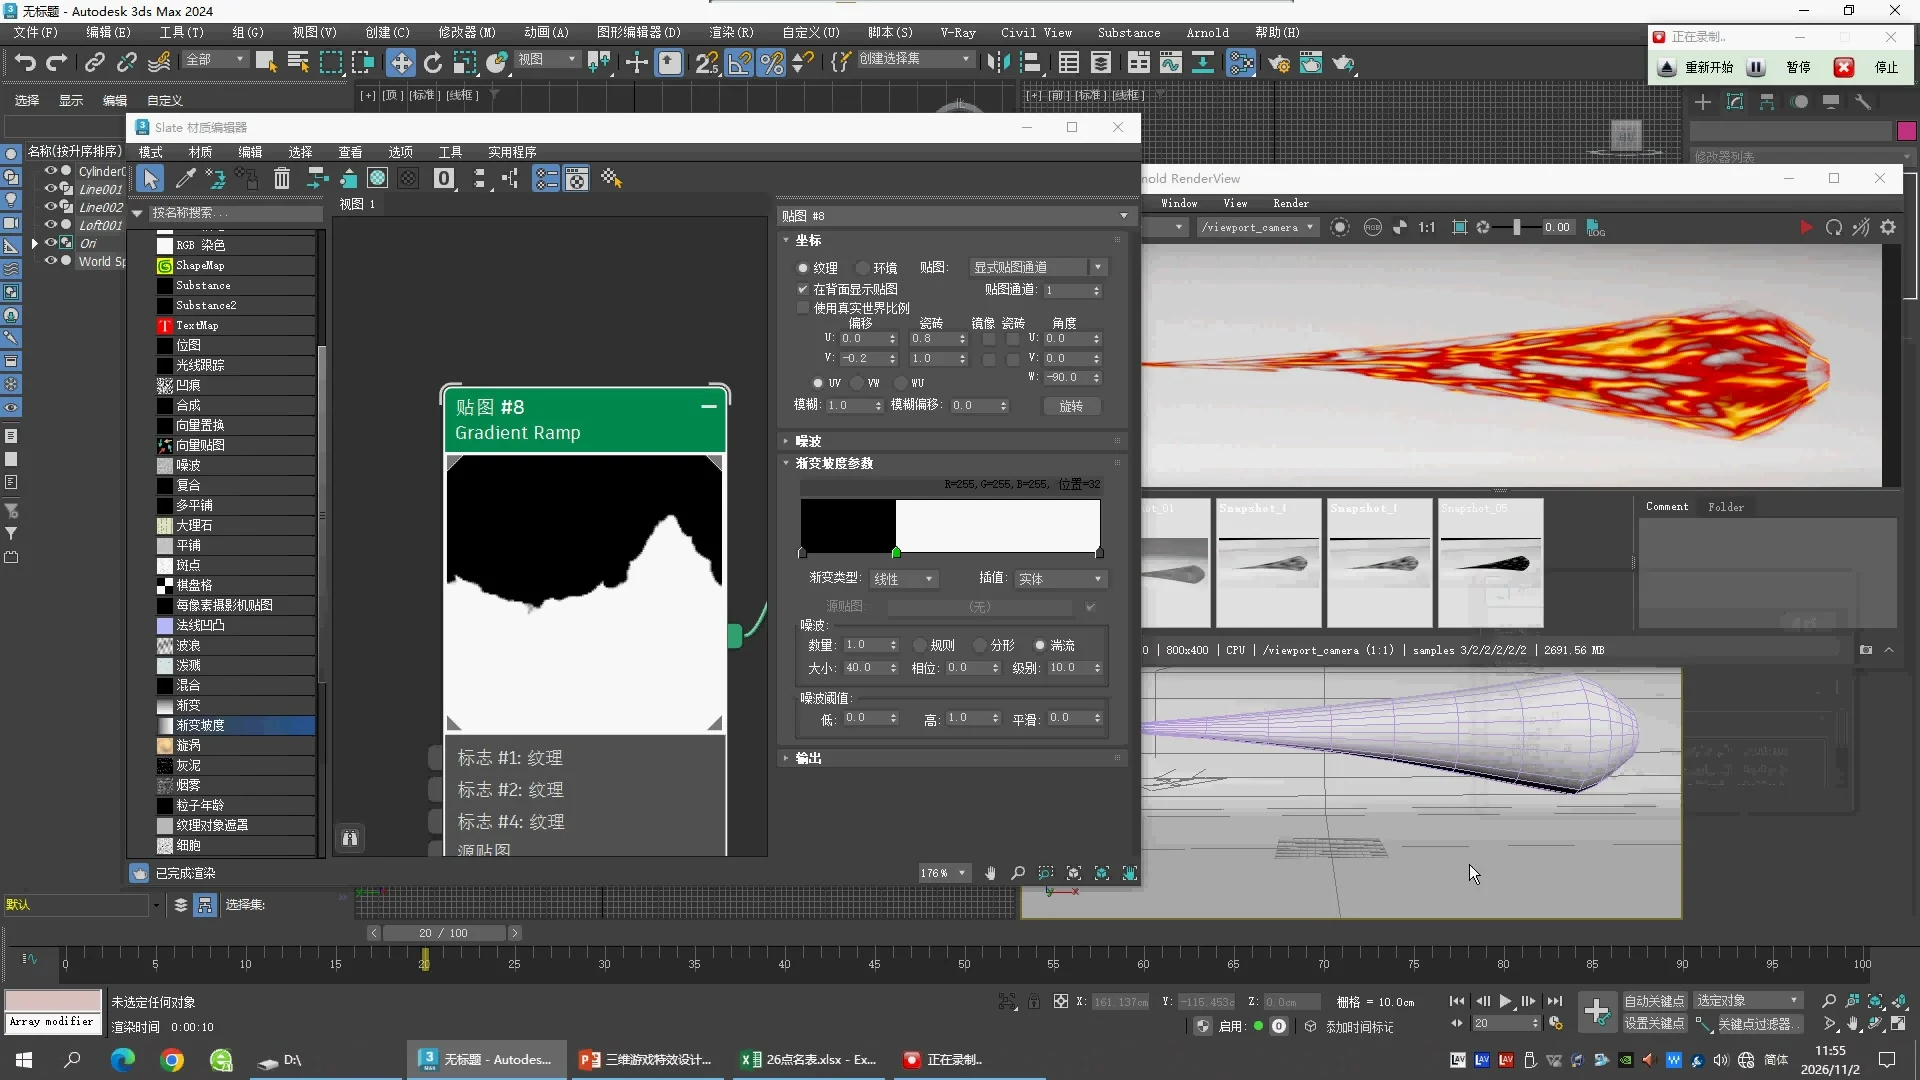
可编辑工程:Solid透明度的两个阶段
已接入Gradient Ramp #8 → Noise #7.Color 1 → Composite.Layer 3,并在Arnold中实际渲染。两个MAX均已保存重开,读回确认Explicit Map Channel及Normal/Spotlight/Darken三层模式。保留第38课的动画模型。
这两份是17分钟与18分钟的硬边噪波比较;12分钟平滑阶段已补在下方,附部分重建的Phase动画。
| Gradient Ramp #8 | 01 · 17分钟 | 02 · 18分钟 |
|---|
| Noise Size | 0.5 | 40 |
| Levels | 4 | 10 |
| Amount / Type | 1 / Turbulence |
| Gradient Type / Interpolation | Linear / Solid |
| White flag | Position32,RGB255/255/255 |
| U Tiling / V Offset / W Angle | 0.8 / -0.2 / -90 |
打开文件后按M进入Slate,使用Pick Material from Object吸取Cylinder001材质;沿opacity向上找到Composite,再进入Layer 3的Noise和Color 1中的Gradient Ramp。先只比较Size与Levels,观察透明区域的大小和边缘变化。
细碎噪波阶段
下载 01_Solid_Fine_17min.max
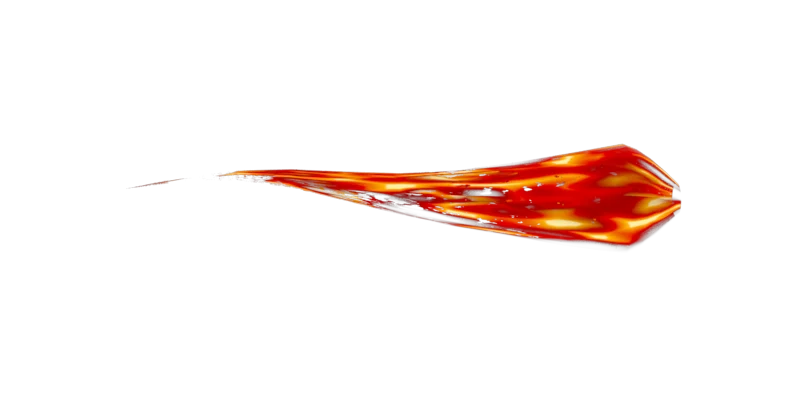
大块噪波阶段
下载 02_Solid_Broad_18min.max
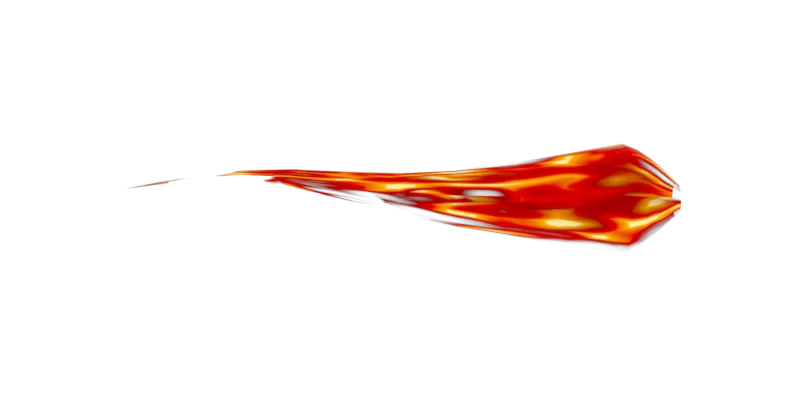
补值与限制:Gradient Ramp端点补为0黑/100白,额外模板色标重合于100;Noise #7 Phase固定0,尚未复刻原片动画;Composite模式取09:30的证据,末段连续性仍待核对。前课Falloff曲线、色标、UV和场景差异仍继承,不能把工程可打开与渲染成功等同逐值还原完成。
保存重开的参数与限制记录
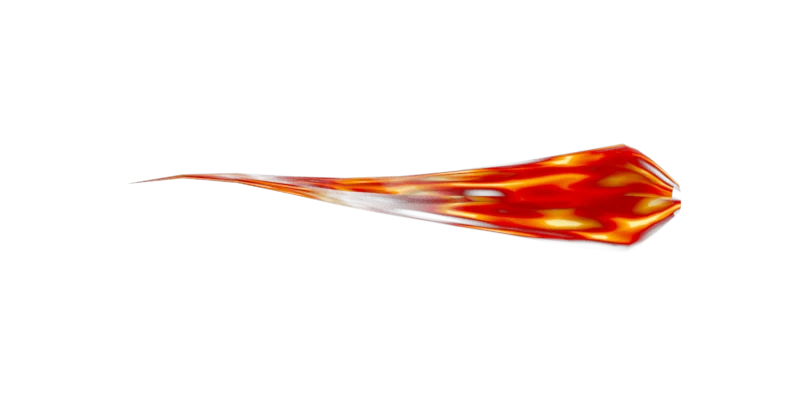
补齐12分钟平滑阶段与Phase动画
纠错:实际Slate核查发现此前把Gradient Type的脚本值0误当作Linear,实际显示4 Corner。已改为4(Linear),重新保存、重开、渲染第39课三个阶段。Interpolation的Ease In已通过Slate核对。
下载平滑阶段 MAX · 保存重开参数记录
| Node / Parameter | Value | 证据 |
|---|
| Noise #7 · Threshold Low / High | 0.2 / 0.3 | 11:30 |
| Gradient #8 · Gradient Type / Interpolation | Linear / Ease In | 12:10 |
| Gray flag · Position / RGB | 39 / 18,18,18 | 12:10 |
| White flag · Position / RGB | 62 / 255,255,255 | 12:00 |
| U / V Tiling; W Angle; Noise Amount | 1 / 1; 90; 0 | 12:10 |
一步一步观察它做什么
- 打开MAX,材质的opacity上接着Composite。沿Layer 3进入Noise #7,再沿Color 1进入Gradient Ramp #8。
- Gradient Ramp的39位置是很暗的灰,62位置是白,两个位置之间逐渐变亮。它改变Noise的第一种颜色,因此不同位置的透明结果不同。
- 将时间滑块依次拖到0、30、100。Noise的Phase会显示0、1.2、4。Phase改变花纹状态;它不移动模型。模型本身的摆动来自继承的Noise Modifier。
- 与01/02两个Solid阶段比较:Ease In保留过渡,Solid产生更突然的颜色分界。注意这三个文件还包含其他阶段参数差异,不能把所有变化归因于Interpolation。
动画哪些确认了,哪些是补值?
原片10:20在frame1显示0.04,10:40在frame100显示4,10:50在frame30显示1.2。新工程用frame0=0、frame100=4的Linear Float重建,保存重开后读回0/1/30/99/100帧为0/0.04/1.2/3.96/4。frame0起点和Linear插值仍是补设。10:30原片frame99显示3.92,与重建3.96不同;需要继续核对操作时序和关键帧,不能宣称精确复刻。
端点补为0黑和100白。相机、UV、Falloff曲线与模型仍有前课继承差异;此阶段不是考核成片。
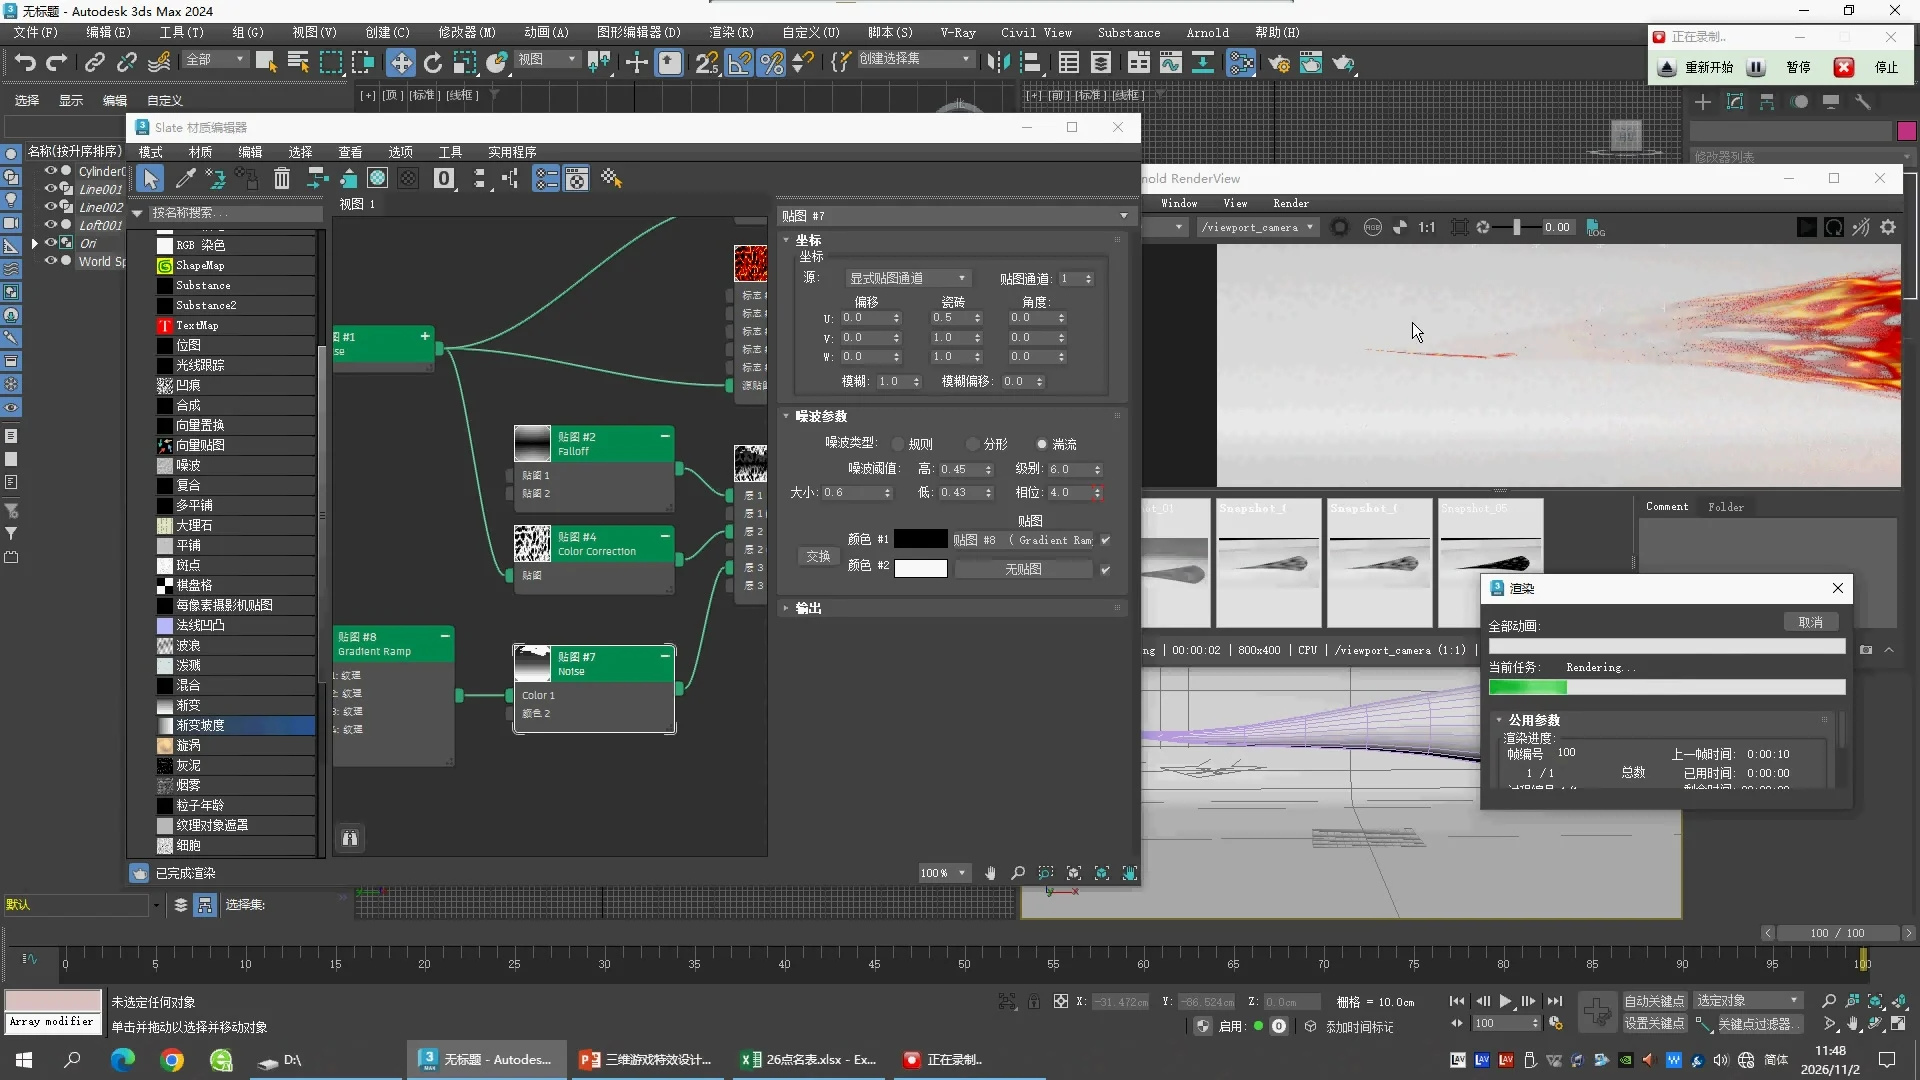 10:40 · frame100 Phase4
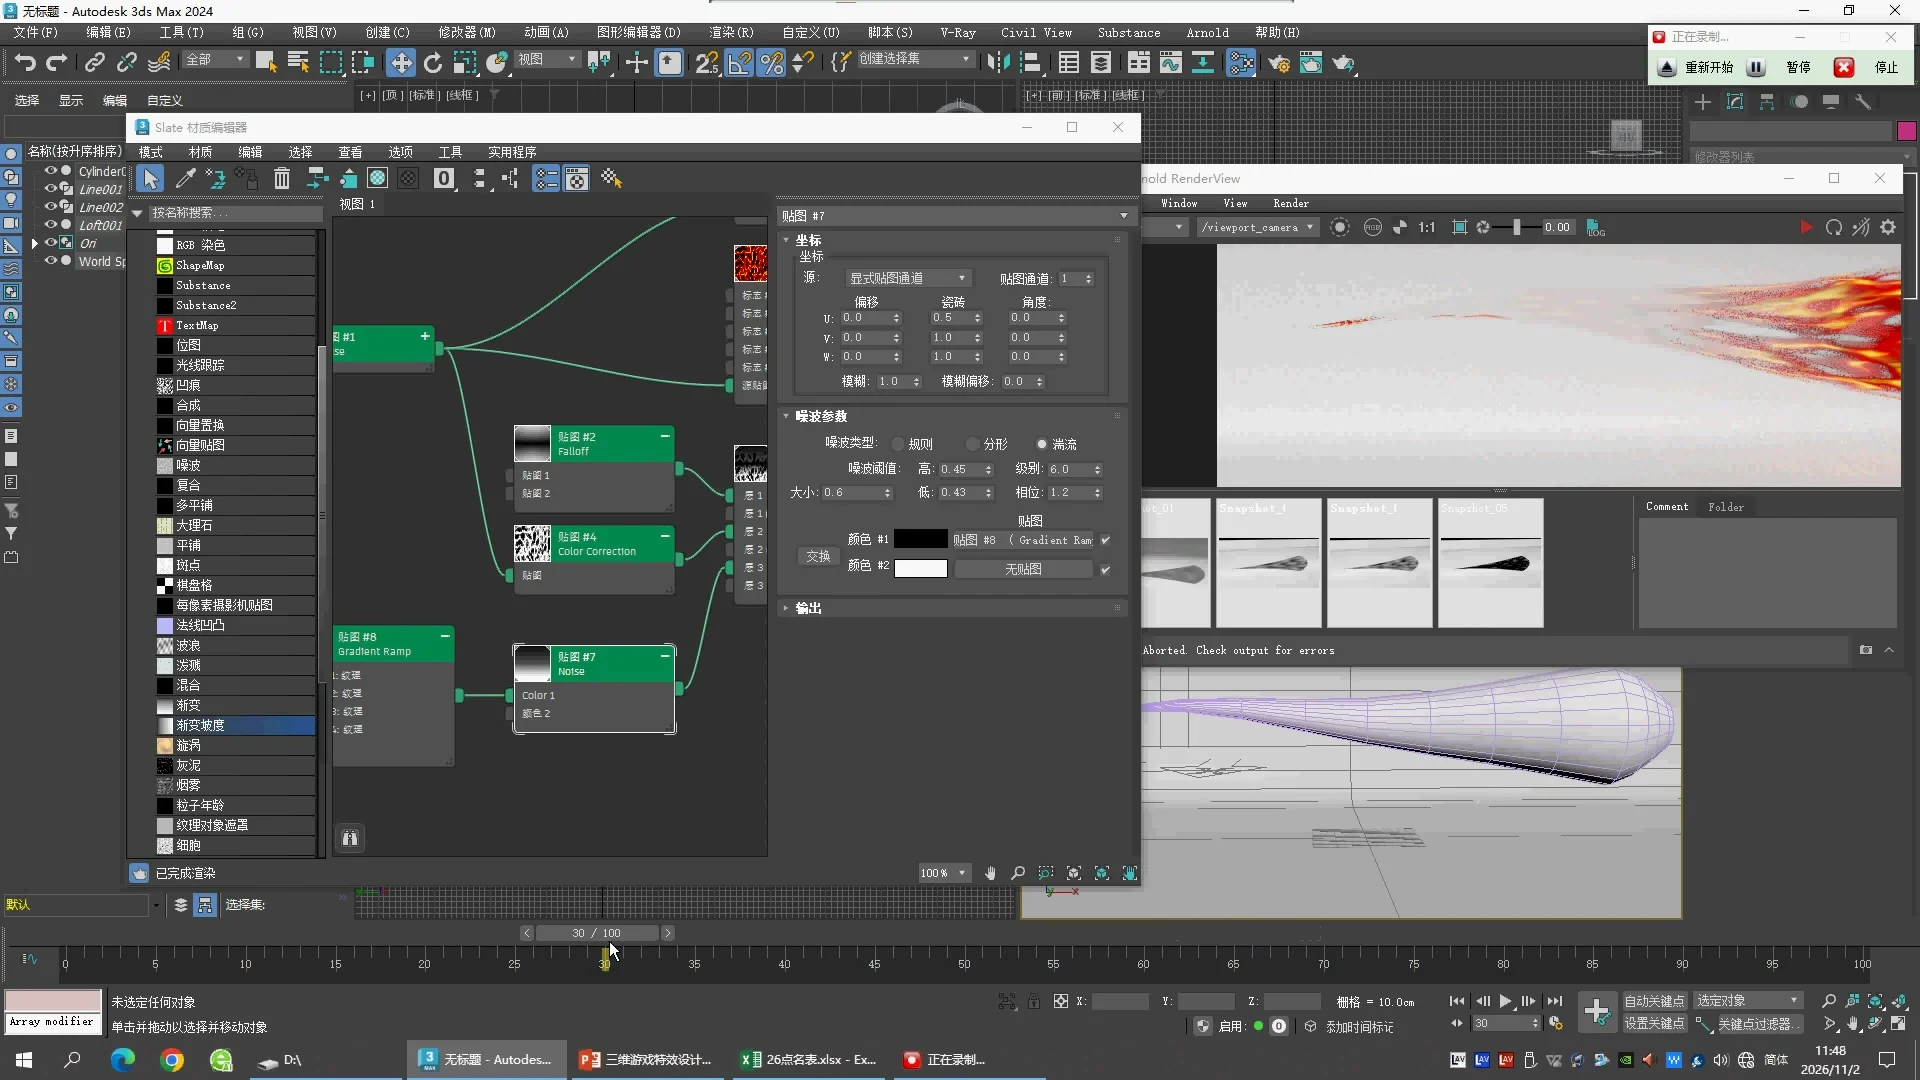 10:50 · frame30 Phase1.2
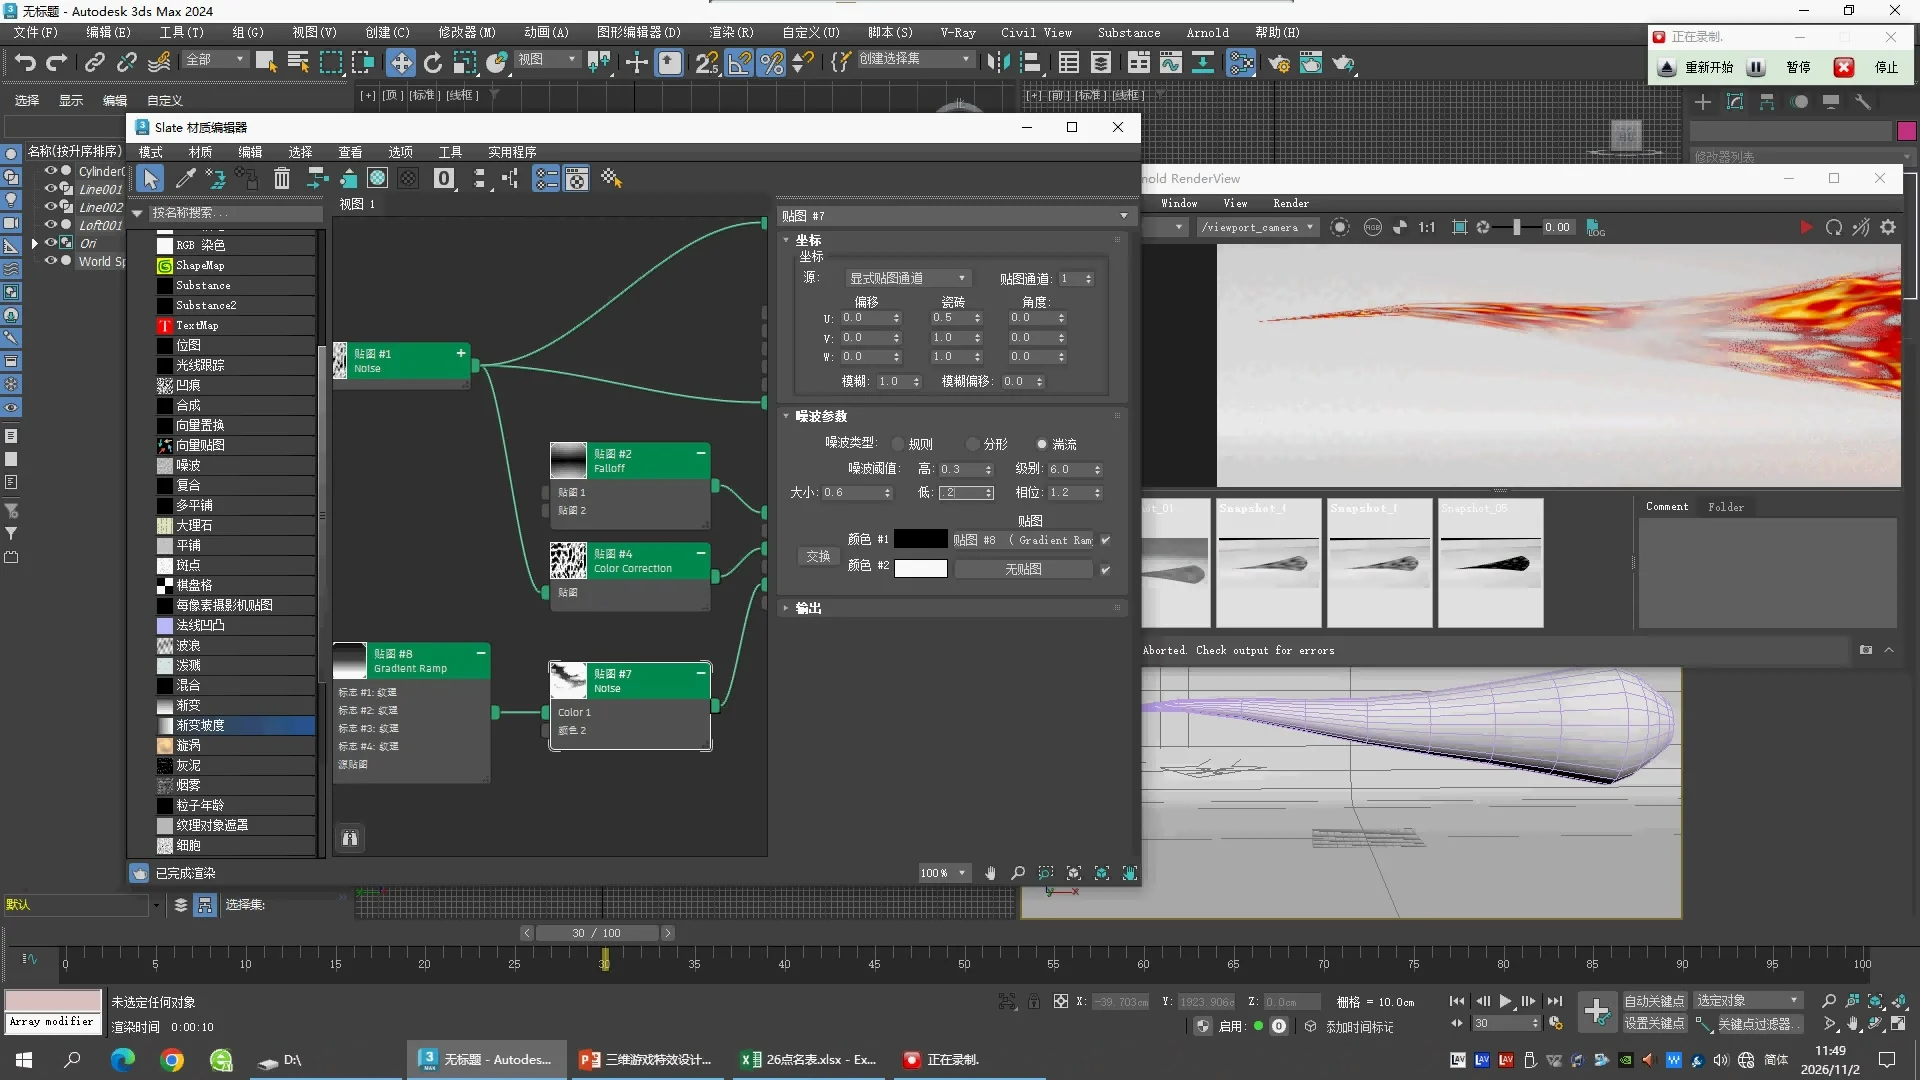 11:30 · Low0.2 High0.3
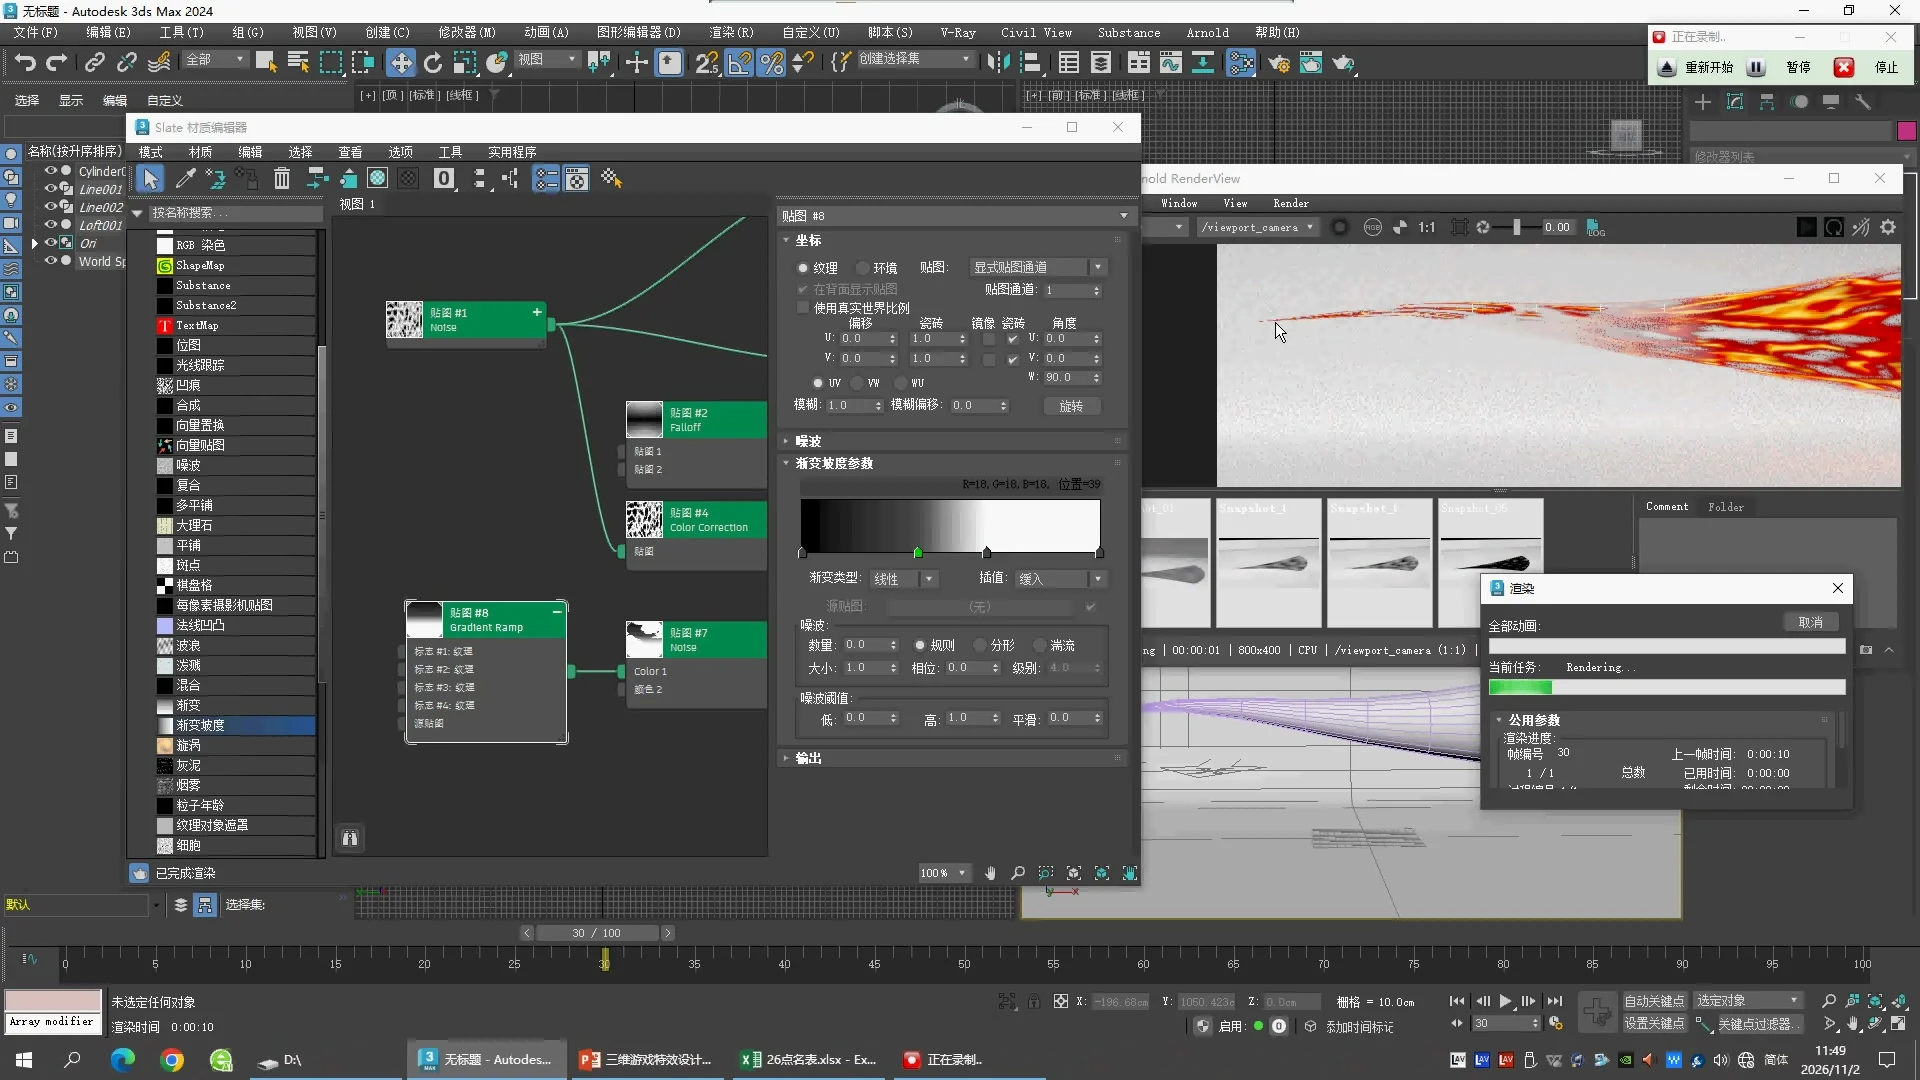 12:10 · Gray39 RGB18
原片画面索引